Proactive Plumbing: How Regular Inspections Protect Your Wallet

Water flowing smoothly through your home provides comfort and convenience, but a sudden pipe failure can quickly turn your sanctuary into a source of immense stress. A minor drip or slow drain might seem harmless initially. Over time, these small imperfections can degrade your property and lead to overwhelming financial burdens.

Routine plumbing inspections act as a vital shield against these unexpected disasters. A licensed professional can identify hidden vulnerabilities behind your walls and beneath your floors long before they cause catastrophic damage. Taking a proactive approach allows you to maintain a healthy home environment while keeping your finances intact.

Knowing how a plumbing system deteriorates helps you appreciate the profound impact of preventative care. By scheduling regular assessments, you safeguard your most valuable asset and secure peace of mind for you and your family.
Call 317-784-1870 for Affordable Home Plumbing Inspections in Indianapolis

Understanding the True Value of a Plumbing Inspection

A professional plumbing evaluation goes far beyond checking for obvious drips under the sink. It is a comprehensive health check for your home’s entire water infrastructure.

Beyond the Quick Fix: Catching Problems Early

Most homeowners only call a plumber when a pipe bursts or a toilet overflows. Waiting for a disaster guarantees a stressful situation and a massive repair bill. Routine inspections detect silent threats, such as micro-leaks, early-stage corrosion, and hairline cracks. Addressing these minor faults early prevents them from escalating into structural damage or hazardous mold growth.

The Lifespan of Your Plumbing System

Pipes and fixtures endure constant pressure and daily use. Consistent maintenance adds years, if not decades, to the life of these systems. Routine care prevents premature deterioration caused by rust, high water pressure, or mineral scaling. When you actively maintain your pipes and appliances, you significantly delay the need for a full, expensive system replacement.

Common Plumbing Issues Prevented by Inspections

Your home’s plumbing faces numerous threats daily. A thorough inspection targets the specific vulnerabilities that cost homeowners the most money.

Leaks and Water Damage: A Costly Consequence

According to the Environmental Protection Agency, a household can waste nearly 10,000 gallons of water annually due to minor leaks. These unseen leaks weaken structural beams, ruin drywall, and encourage mold proliferation. Identifying and sealing a hidden leak early saves you from the devastating costs of extensive home restoration.

Drain Dilemmas: Blockages and Backups

Slow drains often indicate a severe blockage forming deep within your sewer lines. Food waste, grease, hair, and intrusive tree roots gradually choke your pipes. A professional plumber can assess drainage performance to catch this buildup before it completely halts water flow and causes unsanitary sewage backups inside your living space.

Water Heater Woes: Maximizing Efficiency and Longevity

Your water heater works tirelessly to provide warm water, but sediment accumulation forces the unit to work harder and consume more energy. Plumbers check for mineral buildup, test pressure relief valves, and examine the tank for rust. In places like Indianapolis, Indiana, where hard water is prevalent, flushing the tank and inspecting components are critical steps to prevent premature unit failure and lower heating costs.

Pipe Problems: Corrosion and Cracks

Aging pipes are highly susceptible to corrosion and cracking. An inspector will check the integrity of your supply lines and drains, looking for weak joints and rust. Recognizing these signs early allows for targeted, affordable pipe repairs rather than a massive, whole house repiping project.

The Financial Benefits of Regular Plumbing Maintenance

Investing a small amount in maintenance yields a massive return on investment over the lifetime of your property.

Avoiding Emergency Repairs: Planning vs. Panic

Emergency plumbing situations frequently happen outside of standard business hours, leading to premium service charges. Plumbers typically charge emergency trip fees between $150 and $300, and that does not include the cost of the actual repair. Scheduled maintenance allows you to fix problems during standard hours at standard rates, entirely avoiding the panic and premium pricing of midnight plumbing disasters.

Lowering Your Utility Bills: Efficiency Saves Money

A system plagued by leaks and sediment buildup is inherently inefficient. Fixing a dripping faucet or a running toilet directly lowers your monthly water bill. Furthermore, optimizing a water heater can reduce your energy consumption by up to 15%. Over a few years, these monthly utility savings easily cover the cost of your annual inspection.

Protecting Your Property Value

A well-maintained plumbing system is a massive selling point for potential buyers. A documented history of professional inspections proves that the home has been cared for meticulously. Buyers will pay a premium for a home that promises reliable, efficient plumbing free of hidden water damage.

Insurance Implications: Proactive vs. Reactive

The average water damage insurance claim exceeds $10,000. Many insurance policies mandate that a homeowner properly maintains their property to receive coverage. If a massive leak occurs due to obvious, long-term neglect, your insurance provider might deny your claim entirely. Regular inspections provide documented proof of maintenance, ensuring you remain protected by your policy.

What to Expect During a Professional Plumbing Inspection

Understanding the inspection process helps you realize why a trained professional is necessary to evaluate your home effectively.

A Thorough Examination of Your Home’s Plumbing

A licensed plumber will visually check all visible pipes, fixtures, and water-using appliances. They inspect toilets, sinks, bathtubs, water heaters, and outdoor hose bibs. They verify that everything drains correctly, water pressure sits at a safe level, and all safety valves function appropriately.

Advanced Tools and Techniques

Professionals utilize specialized equipment to see what the naked eye cannot. They employ high-definition sewer cameras to travel deep into underground pipes, spotting blockages and root intrusions without digging up your yard. They also use moisture meters and thermal imaging to find hidden leaks behind walls, ensuring no drop of escaping water goes unnoticed.

Detailed Reports and Recommendations

Following the assessment, you will receive a comprehensive written report detailing the health of your system. The plumber will outline any immediate threats, highlight potential future issues, and provide actionable recommendations. This roadmap allows you to prioritize repairs based on your budget and the urgency of the problem.

When Should You Schedule a Plumbing Inspection?

Timing is crucial when protecting your home’s infrastructure. Knowing when to call a professional keeps you ahead of potential disasters.

Annual Check-ups: The Gold Standard

For optimal protection, homeowners should schedule a plumbing inspection once a year. If you live in an older home with aging pipes, annual evaluations are absolutely essential to monitor for rapid deterioration.

Before Buying or Selling a Home

Standard home inspections frequently miss deep-rooted plumbing issues. If you are purchasing a property, a dedicated plumbing evaluation protects you from buying a home with a failing sewer line. If you are selling, an inspection helps you fix minor issues beforehand, preventing buyers from demanding massive price reductions during negotiations.

If You Notice Any Warning Signs

Never ignore the subtle cries for help from your plumbing. If you experience fluctuating water pressure, notice damp spots on your ceilings, hear gurgling sounds from your drains, or smell foul odors, schedule an inspection immediately. Early intervention stops these symptoms from becoming full-scale emergencies.

Frequently Asked Questions

How often should I have my plumbing inspected?

Industry professionals strongly recommend scheduling a plumbing inspection once every year. Homes older than 40 years or those surrounded by large trees may require more frequent checks to monitor aging pipes and root intrusions.

Can I do a plumbing inspection myself?

While you can routinely check for visible leaks under sinks or test your water heater’s temperature, a true inspection requires a licensed professional. Plumbers possess the training to spot subtle warning signs and use advanced tools like sewer cameras and moisture meters to detect hidden problems.

What are the signs I need a plumbing inspection?

You should schedule an inspection if you notice a sudden, unexplained spike in your water bill. Other red flags include constantly running toilets, slow drains throughout the house, foul odors emanating from sinks, or visible water stains on your walls and ceilings.

How much does a plumbing inspection cost?

Plumbing inspection prices vary depending on the size of your home and the depth of the assessment. A basic visual inspection usually ranges from $100 to $200. A comprehensive inspection that includes a sewer line camera evaluation typically averages around $300.

Investing in Your Home’s Future

A healthy plumbing system forms the foundation of a comfortable, safe home. By embracing routine maintenance, you actively protect your property from devastating water damage and prevent minor issues from draining your bank account. Professional assessments grant you the clarity to make informed decisions about your home’s upkeep, ensuring your pipes and fixtures serve you reliably for decades to come.

Request a comprehensive plumbing inspection in Indianapolis, Indiana. Request a free estimate today!

Call Now to Book Service

Related Post: Money-Saving Plumbing Tips You Don’t Want to Ignore

The Science of Reverse Osmosis: How It Cleans Your Water

Turning on the tap feels like a simple act, but the water flowing into your glass often carries hidden baggage. From heavy metals to microscopic plastics, municipal water systems cannot always catch everything that travels through the aging pipes.

If you want truly clean drinking water, you need a reliable filtration method. Reverse osmosis consistently ranks as one of the most effective ways to purify water at home. It sounds complicated, but the underlying science is actually quite straightforward.

This guide explores exactly how reverse osmosis works to strip away unwanted contaminants. You will learn about the technology, its everyday benefits, and why ditching single-use plastic bottles makes financial sense. By the end, you will know exactly what it takes to get crystal-clear water flowing right from your own kitchen sink.

Reverse Osmosis
Reverse Osmosis Guide

The Fundamentals of Reverse Osmosis Technology

To understand reverse osmosis, it helps to first look at natural osmosis. Osmosis is the natural movement of water through a semipermeable membrane from an area of low solute concentration to an area of high solute concentration. Plants use this natural process to absorb water from the soil.

Reverse osmosis (RO) flips this process to clean your water. By applying pressure to the source water from your plumbing, the system forces water molecules through a synthetic, microscopic membrane.

This semipermeable barrier acts like an incredibly fine sieve. It allows the tiny water molecules to pass through while blocking dissolved salts, organic matter, bacteria, and heavy metals. The result is highly purified water on one side of the membrane, and a rejected stream of concentrated contaminants on the other, which washes safely down the drain.

Key Benefits of Reverse Osmosis Systems

Health and Purity Advantages

RO systems are incredibly powerful and highly effective. They can remove up to 99.99% of harmful contaminants from your drinking supply.

City treatment plants do a great job of sanitizing water, but they can occasionally miss microscopic threats like PFAS (often called forever chemicals), lead, and arsenic. Arsenic, for example, is a known carcinogen that frequently shows up in local water supplies across the country. An RO filter provides a final, heavy-duty line of defense so your family stays safe and well-hydrated.

Economic and Environmental Impact

Many people buy bottled water because they believe it is the safest, cleanest option available. However, that habit quickly drains your wallet and severely harms the planet.

Installing an RO system practically eliminates your need for single-use plastics. You stop contributing to overflowing landfills and help reduce the microplastics entering our global ecosystems. Over a period of just a few years, the cost of replacing RO filters is dramatically lower than buying cases of bottled water every week. You get the same, if not better, water quality for pennies on the gallon.

Applications of Reverse Osmosis

Residential Uses

At home, people usually install under-sink RO units in their kitchens. These dedicated systems provide pristine water for drinking, cooking, and making ice. Because the water lacks harsh chemicals and dissolved solids, your morning coffee tastes richer, your soups have better flavor, and your ice cubes come out perfectly clear.

Industrial and Commercial Applications

Reverse osmosis is not just for residential kitchens. Businesses rely heavily on this technology every single day. Car washes use commercial RO systems for spot-free rinses. Breweries rely on purified water to ensure a consistent, predictable flavor profile for their beer. Even medical facilities and laboratories use industrial-grade reverse osmosis systems to sanitize equipment and ensure maximum patient safety.

Maintaining Your Reverse Osmosis System

Filter Replacement and System Care

An RO system needs regular upkeep to function properly. Most home setups use a multi-stage process featuring pre-filters, the RO membrane, and post-filters.

  • Pre-filters catch large sediment and chlorine to protect the delicate central membrane from damage. You should replace these pre-filters every six to twelve months.
  • The main RO membrane does the heavy lifting and typically lasts two to three years, depending on your local water quality.
  • A post-filter polishes the water before it hits your glass, requiring an annual swap to keep things tasting fresh.

Troubleshooting Common Issues

Sometimes your system might act up, but the fixes are usually simple. If you notice a slow water flow, you probably have a clogged pre-filter or unusually low water pressure in your home plumbing.

Strange noises, like hissing or gurgling, often point to trapped air in the water lines after a filter change. If your water suddenly starts tasting bad, it is a clear sign that you need to change the membrane or sanitize the holding tank.

Reverse Osmosis vs. Other Water Filtration Methods

Reverse Osmosis and Osmosis

How does RO stack up against standard carbon filters or distillation setups?

  • Standard carbon filters, like the ones in popular water pitchers, are great for removing chlorine and improving taste. However, they leave behind most dissolved solids, heavy metals, and fluoride.
  • Distillation removes almost everything by boiling the water and collecting the purified steam. It works incredibly well, but it uses a significant amount of electricity and takes hours to produce a small batch of water.

Reverse osmosis provides the best overall balance. It offers the extreme purity of distillation alongside the on-demand convenience of a standard carbon filter. Installing a water softener further optimizes your RO benefits.

Frequently Asked Questions About Reverse Osmosis

Does reverse osmosis remove beneficial minerals?

Yes, the membrane is so fine that it removes naturally occurring calcium and magnesium alongside the harmful contaminants. Because of this, many modern RO systems include a special remineralization stage. This final filter adds a healthy balance of essential minerals back into the water before you drink it, improving both the health benefits and the taste.

Does reverse osmosis remove microplastics?

Absolutely. RO membranes feature microscopic pores as small as 0.001 microns. This dense barrier easily catches and blocks microplastics from entering your drinking water, ensuring a much cleaner pour.

Is RO water safe for pets and plants?

Yes. Pets thrive on clean, chemical-free water just like humans do. Additionally, many delicate houseplants actually prefer RO water because it lacks the harsh chlorine and heavy salts found in standard municipal tap water.

Taking Control of Your Home Water Quality

Safe drinking water is essential for a healthy, happy home. Reverse osmosis gives you total peace of mind, knowing your water is free from dangerous contaminants and heavy metals.

However, local water conditions play a huge role in how well your filtration systems operate. In places like Indianapolis, water hardness levels often sit between 12 and 25 grains per gallon. This extremely hard water can quickly clog and destroy a delicate RO membrane. The best way to protect your RO system is to soften the water before it ever reaches the filter.

If you want to protect your home’s plumbing and enjoy truly pure drinking water, we can help. Contact us today for professional water softener service, repair, and installation in Indianapolis and surrounding areas.

Call to Request a Quote

Related Post: 5 Benefits of Using a Reverse Osmosis System in Your Home

Choosing a New Water Heater: A Guide for Residential Property Owners

Stepping into a shower only to be greeted by freezing water is a jarring experience. A reliable supply of hot water is essential for daily comfort, from morning routines to cleaning dishes and washing laundry. When your current system starts failing, finding the right replacement becomes an urgent priority.

A water heater is a significant investment in your home’s infrastructure. Making the right choice ensures you have consistent hot water while managing your monthly utility bills. With various types, sizes, and efficiency ratings available, the selection process can easily feel overwhelming.

Understanding how different systems work is crucial for maintaining a comfortable home. This guide will walk you through the options, helping you select a unit that meets your household’s unique demands.

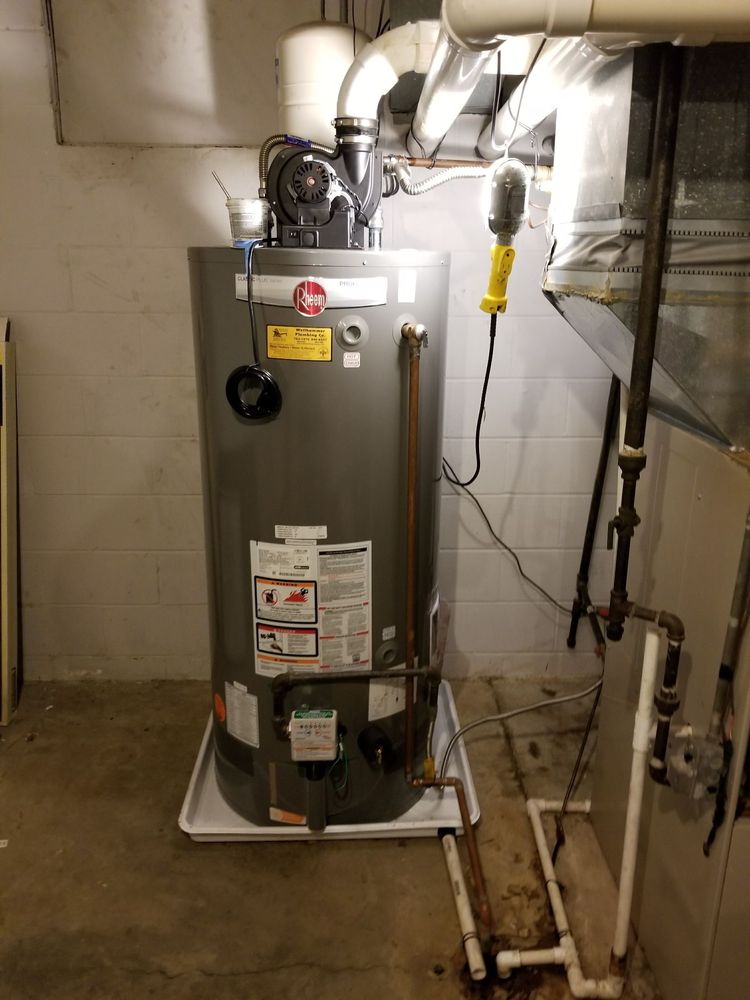
Call 317-784-1870 to Get a Residential Rheem 50 Gallon Water Heater for $1899!

Understanding Water Heater Types

The first step in finding the right system is knowing what options exist. Different models heat and store water in completely different ways.

Conventional Storage Tank Water Heaters

These are the most common units found in residential homes. They feature an insulated tank that holds a specific volume of water, keeping it heated and ready for use. When you turn on a hot water tap, the heated water is released from the top of the tank, while cold water enters the bottom to be heated. They are generally the most affordable to purchase, though they experience “standby heat loss” since the water is kept hot continuously.

Tankless Water Heaters

Also known as on-demand systems, tankless units heat water directly without the use of a storage tank. When a hot water tap is turned on, cold water travels through a pipe into the unit, where a gas burner or an electric element heats it instantly. They provide a constant supply of hot water and eliminate standby heat loss, making them highly energy-efficient.

Heat Pump (Hybrid) Water Heaters

Heat pump water heaters capture heat from the air and transfer it to the water. They use electricity to move heat from one place to another instead of generating heat directly. Because of this unique operation, they can be two to three times more energy-efficient than conventional electric resistance water heaters.

Solar Water Heaters

Solar water heating systems use roof-mounted panels to absorb the sun’s thermal energy, which is then transferred to an antifreeze-like fluid in a closed-loop system. This fluid runs through a heat exchanger to warm the water in a storage tank. While they have a higher upfront cost, they offer significant long-term savings on energy bills.

Key Factors for Selecting a Water Heater

Once you know the types available, you must narrow down the choices based on your home’s specific requirements.

Fuel Type and Energy Efficiency

Your fuel choice heavily impacts your annual operating costs. The most common fuel types are electricity and natural gas. Natural gas water heaters typically cost more to purchase and install but are generally less expensive to operate than electric models. If you are switching fuel types, keep in mind that retrofitting your home for gas or upgrading your electrical panel can add significantly to the installation cost.

Sizing Your Water Heater for Your Home

A properly sized water heater will meet your household’s peak demands without wasting energy. For conventional tanks, you need to look at the First Hour Rating (FHR). The FHR measures how much hot water the heater can deliver in an hour when starting with a full tank. The formula for FHR is roughly the tank capacity multiplied by 0.70, plus the recovery rate. A household of one to two people generally needs a 30 to 40-gallon tank. If you have three or four people living in the home, a 50-gallon tank is often necessary.

Energy Factor (EF) and Uniform Energy Factor (UEF)

Efficiency ratings help you understand how well a unit converts energy into heat. Historically, the Energy Factor (EF) was the standard metric. Today, the Uniform Energy Factor (UEF) is the modern standard used for residential water heaters. A higher UEF indicates a more efficient water heater, which directly translates to lower operating costs.

Cost Considerations: Purchase, Installation, and Operation

When budgeting for a new system, you must look at the total cost of ownership. A tankless water heater might cost twice as much as a conventional tank upfront. However, its lower operating costs and longer lifespan can offset the initial price tag over time. Always weigh the upfront installation expenses against the projected monthly energy savings.

Water Heater Installation and Maintenance Tips

A water heater is only as good as its installation and upkeep. Proper care guarantees your system operates safely and efficiently.

Professional Installation Benefits

Installing a water heater involves working with electricity, natural gas, carbon monoxide venting, and pressurized water. It is a complex job that requires strict adherence to local building codes. For example, Indiana code requires non-pressurized expansion tanks to be securely fastened and supported to carry twice the weight of the tank filled with water. Hiring a professional water heater service ensures the job meets all safety regulations and protects your manufacturer’s warranty.

Regular Maintenance for Longevity

Routine maintenance is vital, especially if you live in an area with hard water. In Indianapolis, the water hardness averages between 12 and 25 grains per gallon, which is considered extremely hard. This high mineral content leads to rapid calcium and sediment buildup inside your tank. Flushing your water heater at least once a year helps remove this sediment, preventing blockages, increasing efficiency, and extending the life of your appliance.

Frequently Asked Questions

How do I know if my water heater needs replacing?

Signs of a failing unit include rusty water coming from your hot taps, rumbling or popping noises from the tank, visible leaks around the base, and a consistent lack of hot water. If your unit requires frequent repairs, replacement is often the more economical choice.

What is the average lifespan of a water heater?

Conventional storage tank water heaters generally last between 8 and 12 years. Tankless water heaters have a longer life expectancy, often lasting 15 to 20 years when properly maintained.

Can I install a water heater myself?

While some experienced DIYers might attempt it, professional installation is highly recommended. Improper installation can lead to gas leaks, electrical fires, water damage, and dangerous carbon monoxide buildup.

How can I improve my water heater’s efficiency?

You can easily boost efficiency by lowering the thermostat on your unit to 120 degrees Fahrenheit. Insulating the first few feet of the hot and cold water pipes connected to the heater also prevents heat loss.

Making an Informed Decision

Replacing a water heater is a major home improvement project that requires careful thought. By understanding your household’s hot water usage, comparing different heating technologies, and paying attention to efficiency ratings, you can select a system that provides lasting comfort. Remember that regular maintenance and professional installation are just as important as the unit you choose to buy.

If you are ready for a reliable upgrade, we have an exclusive offer just for you. Take advantage of our current special and enjoy a brand new 50-Gallon Rheem water heater delivered and installed for just $1899*. This complete package includes the free removal of your old unit. Ensure your home has endless hot water and expert installation by contacting our team today to schedule your service.

Call Now to Book Service

Related Post: Water Heater Troubleshooting: How to Figure Out What’s Wrong

Top Signs You Need to Call a Professional Plumber Today

A dripping faucet or a slow drain might seem like a minor annoyance, but these small issues can quickly turn into major headaches. Your home is your sanctuary, and maintaining it requires a keen eye. Plumbing problems have a sneaky way of escalating from an easy fix to a flooded basement or ruined drywall.

Catching the early warning signs of plumbing failure saves you money, time, and stress. This guide walks you through the clearest indicators that it is time to put away the plunger and call in an expert. We will help you recognize when a problem is out of your hands so you can protect your property from costly water damage.

Call a Plumber at 317-784-1870 in Indianapolis Indiana

Persistent Low Water Pressure Throughout the Home

If water barely trickles from your showerhead or sinks, you likely have widespread pipe corrosion, a hidden leak, or severe mineral buildup restricting your water flow. Indianapolis is notorious for hard water, which contains high levels of dissolved calcium and magnesium.

Over time, these minerals accumulate inside your pipes and severely reduce water pressure. While cleaning a showerhead aerator might offer a temporary fix, widespread low pressure means the problem is systemic.

Potential Hidden Leaks or Pipe Corroded Issues

When hard water is not the culprit, low water pressure often points to hidden leaks or deteriorating pipes. Older homes are especially vulnerable to corroded pipes that eventually split or burst. Because diagnosing the exact cause requires specialized equipment, a professional plumber is necessary to safely locate and repair the compromised lines.

Slow Draining Sinks and Showers

Sinks and showers that take forever to empty usually indicate a severe blockage forming deep within your plumbing system. Hair, soap scum, and grease naturally accumulate in pipes over time. You might reach for a chemical drain cleaner, but these harsh liquids can eat away at your plumbing and make the situation much worse. If multiple drains in your home are backing up at once, the issue is far beyond a simple surface clog.

Identifying Deep Main Line Clogs

A slow drain across multiple fixtures is a major red flag for a main sewer line clog. Tree roots frequently invade underground pipes, or shifting soil can cause severe misalignment. Plumbers use advanced camera inspections to see exactly what is blocking your main line, allowing them to clear the obstruction without damaging your yard or property.

Unexpected Discolored Water from Faucets

Brown, yellow, or cloudy water flowing from your taps indicates rust, sediment buildup, or a failing water heater. Clean water should always be crystal clear. If you turn on the tap and see muddy or rust-colored water, your pipes might be corroding from the inside out.

In some cases, the municipal water supply experiences a temporary issue. However, if the discoloration persists, you need an expert to inspect your system immediately to ensure your water remains safe for daily use.

Identifying Water Heater Sediment or Rust

If the discoloration only happens when you run the hot water, your water heater is likely the source. Sediment collects at the bottom of the tank over the years, leading to rust and decreased heating efficiency. A licensed plumber can flush the tank to remove this buildup or advise you if it is time to install a new unit.

Mysterious Wet Spots on Walls or Floors

Unexplained damp patches on your walls, ceilings, or yard are clear signs of an active, hidden pipe leak. Water stains are more than just an unsightly blemish. They show that water is escaping your pipes and soaking into your home’s structural materials. Even a pinhole leak can release gallons of water over a few days, leading to wood rot and hazardous mold growth.

If you notice a soggy area in your yard that hasn’t seen rain, your underground water main or sewer line might be compromised. Finding the exact source of an underground or behind-the-wall leak requires professional acoustic and thermal detection tools.

Unusual Sewage Smells or Gurgling Sounds

Foul odors and bubbling noises coming from your drains mean your sewer line is blocked or your venting system is failing. A healthy plumbing system operates silently and without any noticeable smells. If you hear a gurgling sound when you flush the toilet or drain the sink, air is trapped in your pipes. This usually precedes a messy and hazardous sewage backup.

Similarly, the smell of raw sewage inside or around your home is a serious health hazard. It often means a sewer pipe has cracked or a trap has dried out. You should never ignore these smells, as they indicate a critical failure that requires immediate professional intervention.

Spiking Water Bills Without Increased Usage

An inexplicably high water bill is the most reliable financial indicator that your home has a continuous, unseen leak. According to the Environmental Protection Agency, the average household can waste nearly 10,000 gallons of water a year due to minor leaks.

A constantly running toilet, a dripping outdoor spigot, or a fractured underground pipe will send your utility costs soaring. If your daily habits have not changed but your bill has doubled, a professional plumber can pinpoint the invisible leak and restore your system’s efficiency.

Don’t Wait for a Plumbing Disaster

Recognizing early warning signs like low pressure, slow drains, and sudden leaks allows you to fix plumbing issues before they cause catastrophic property damage. Your home speaks to you through its systems. By paying attention to strange sounds, unusual smells, and changes in water flow, you can stay one step ahead of major plumbing failures.

Attempting complex repairs on your own often leads to more expensive problems down the line. Trusting a professional ensures your plumbing operates safely, efficiently, and reliably.

For licensed plumbing repair in Indianapolis, Indiana, trust the experts to handle everything from routine maintenance to complex emergencies. We provide top-tier residential and commercial service to keep your property safe. Request a free estimate today and secure your peace of mind.

Call a Plumber Now

Related Post: DIY Plumbing Repair: The Do’s and Don’ts

Solving Hard Water Problems in Your Home: Common Treatment Options

Turning on the faucet should bring refreshing, clean water, but for many households, it brings an invisible frustration. Hard water is a common issue that affects everything from your daily shower to the lifespan of your plumbing. If you are constantly scrubbing residue off your fixtures or dealing with irritated skin, you are likely facing high mineral content in your water supply.

Understanding how these minerals affect your body and your home is crucial for maintaining a healthy living environment. This guide explains the exact mechanisms behind hard water and explores the most effective treatment options available to help you protect your plumbing and improve your daily routine.

Call 317-784-1870 for Affordable Hard Water Treatment Options in Indianapolis

Understanding Hard Water: What Is Mineral Buildup?

Hard water is water that contains high concentrations of dissolved minerals, primarily calcium and magnesium. As groundwater moves through natural soil and rock formations, it readily dissolves these minerals and carries them into your home’s water supply.

The United States Geological Survey classifies water hardness based on the concentration of these minerals. Water containing 0 to 60 milligrams per liter (mg/L) of calcium carbonate is considered soft, while anything above 120 mg/L is classified as hard.

Over time, these dissolved minerals precipitate out of the water. When they settle, they create a tough, crusty white buildup known as scale. This scale accumulates inside your pipes, clogs your showerheads, and coats the heating elements of your household appliances, reducing their overall efficiency and lifespan.

Recognizing the Signs of Hard Water in Your Home

The most common signs of hard water include crusty scale on fixtures, stubborn soap scum, and persistently dry skin or hair. Hard water minerals react poorly with soap and shampoo, preventing them from lathering properly.

Instead of washing away cleanly, the soap binds with the calcium to form a sticky residue. You will often notice this as a stubborn film coating your shower doors, or as cloudy white spots on your glassware straight out of the dishwasher. Your laundry might also feel stiff and look faded after just a few washes.

On a personal level, bathing in hard water strips natural oils from your body. You might step out of the shower feeling a tight residue on your skin. This frequently leads to irritation, severe dryness, and brittle, unmanageable hair.

Water Softener Systems: How Ion Exchange Works

Water softeners eliminate hard water by using a process called ion exchange to physically remove calcium and magnesium from your water supply. These whole-house filtration systems contain a primary tank filled with negatively charged resin beads. These beads are coated in sodium or potassium ions.

Because calcium and magnesium hold a strong positive charge, they are naturally drawn to the resin beads like magnets. As the hard water flows through the tank, the beads grab the hardness minerals and release the sodium or potassium into the water in their place.

The end result is completely soft water running through your plumbing. To keep the system functioning effectively, the unit will periodically flush the resin bed with a saltwater brine solution during a automated regeneration cycle. This washes the trapped calcium and magnesium down the drain, recharging the beads for the next cycle.

Always hire a professional plumber for water softener installation and repair to ensure proper code adherence and safety. Call Weilhammer Plumbing Company at 317-784-1870 today to book a free estimate.

Salt-Free Conditioners: Template-Assisted Crystallization

Salt-free water conditioners use template-assisted crystallization (TAC) to change the structure of hardness minerals without actually removing them. If you prefer to avoid salt usage and eliminate wastewater, a TAC conditioner offers a compelling alternative to traditional softeners.

Instead of an ion exchange process, your water passes through a specially treated resin bed. Microscopic nucleation sites on this resin transform the dissolved calcium and magnesium into suspended microscopic crystals.

Because these minerals are now crystallized, they lose their ability to stick to surfaces and form damaging scale inside your pipes and appliances. While TAC systems require much less maintenance and retain beneficial dietary minerals, the water remains technically hard. You will see a significant reduction in appliance scale, but the water may not lather soap quite as easily as it would with an ion-exchange softener.

Reverse Osmosis Filtration: Point-of-Use Purification

Reverse osmosis (RO) systems push water through a semipermeable membrane to drastically reduce dissolved solids, including hardness minerals. While softeners and conditioners treat water for the entire house, reverse osmosis is typically installed right under the kitchen sink to provide ultra-pure drinking water. The dense RO membrane blocks heavy metals, nitrates, and dissolved calcium and magnesium. This multi-stage process creates exceptionally clean water.

Because the natural minerals are entirely stripped away, the water can sometimes taste a bit flat. To solve this, many modern reverse osmosis units feature a remineralization cartridge as their final filtration stage. This specific cartridge reintroduces tiny amounts of healthy minerals like calcium, ensuring your drinking water tastes great while maintaining an optimal pH balance.

Maintaining Your Appliances Against Scale Buildup

You can extend the life of your water heater, washing  machine, and dishwasher by performing routine flushes and using targeted descaling agents. Hard water is particularly tough on appliances that heat water. In a traditional water heater, minerals rapidly settle at the bottom of the tank, forcing the heating element to work harder and consume more energy.

Plumbers highly recommend flushing your water heater tank every six to twelve months. This simple maintenance step removes loose sediment before it can solidify into a thick layer of scale. You should also have the sacrificial anode rod checked annually, as this component is designed to attract corrosive elements and prevent the tank itself from rusting.

For dishwashers and washing machines, running a hot, empty cycle with a specialized descaler or plain white vinegar once a month is highly beneficial. This clears away internal mineral deposits and keeps the spray arms and internal pumps functioning smoothly.

Frequently Asked Questions About Water Treatment

Here are clear answers to the most common questions homeowners have regarding hard water treatment installation, maintenance, and costs.

How often do water softeners need maintenance?

You should check the salt levels in the brine tank every four to six weeks, ensuring it remains at least half full. The system itself regenerates automatically, typically every few days depending on your specific household water usage. The internal resin bed generally lasts ten to fifteen years before it requires replacement by a professional.

Is softened water safe to drink?

Yes, softened water is completely safe for most people to consume. The ion exchange process adds a very small amount of sodium to the water. If you are on a strict low-sodium diet prescribed by a doctor, you can use potassium chloride pellets instead of standard salt. Alternatively, you can install a reverse osmosis system at your kitchen sink to remove the sodium specifically for your drinking water.

How much does a water softener cost?

A quality whole-house water softener typically ranges from $1,000 to $3,000. This price usually includes the cost of the unit itself and the professional plumbing installation required to integrate it into your main water line. The exact price will depend on the capacity of the system and the severity of your local water hardness.

Wrapping Up

Local experts provide the exact sizing, installation, and preventative maintenance needed to combat hard water damage effectively. Implementing the right water treatment solution protects your plumbing, improves your skin, and saves you money on premature appliance replacements.

Protect your home with professional water softener sales, installation, and service in Indianapolis. Contact us today to schedule your installation and enjoy reliable hot water again.

Call Now to Book Service

Related Post: Hard Water Returning? How to Troubleshoot Your Softener at Home

The Ultimate Guide to Flushing Your Water Heater for World Plumbing Day

Every March 11, professionals across 70+ countries celebrate World Plumbing Day—a moment recognized by the World Plumbing Council to highlight the vital role plumbing plays in public health, safety, and everyday life. It’s also a fitting reminder that the plumbing systems inside your own home deserve some attention.

Your water heater is one of the hardest-working appliances in your house. It runs quietly in the background, day after day, heating water for showers, dishes, and laundry without much fanfare. But neglect it long enough, and sediment quietly accumulates at the bottom of the tank—reducing efficiency, shortening the unit’s lifespan, and driving up your energy bills.

The good news? A regular tank flush is one of the simplest and most effective maintenance tasks a homeowner can perform. This guide walks you through everything you need to know—from spotting the warning signs to completing a safe, thorough flush—so you can honor World Plumbing Day the right way.

Call 317-784-1870 For Professional Water Heater Flushing in Indianapolis Indiana

Signs Your Water Heater Needs a Flush

Sediment buildup doesn’t announce itself loudly. It tends to creep up gradually, which is why so many homeowners miss it until a real problem develops. Here are the most common warning signs to watch for:

  • Unusual noises – Popping, rumbling, or banging sounds coming from your tank are classic indicators of sediment. As minerals like calcium and magnesium harden at the bottom of the tank, they create turbulence during the heating cycle.
  • Inconsistent water temperature – Hot water that fluctuates or runs out faster than it used to can point to a sediment layer insulating the heating element from the water above it.
  • Longer heating times – If your water takes noticeably longer to heat up, sediment may be forcing your unit to work harder than it should.
  • Rusty or discolored water – Reddish-brown hot water suggests corrosion inside the tank, often accelerated by mineral deposits.
  • Rising energy bills – A less efficient water heater consumes more energy. If your utility costs are climbing without a clear explanation, your water heater may be the culprit.

If any of these signs sound familiar, your tank is overdue for a flush. Schedule affordable water heater service in Indianapolis with our professional plumbers at Weilhammer Plumbing Company.

Step-by-Step Instructions: How to Safely Drain and Flush Your Tank

Flushing a water heater is a beginner-level task that takes under two hours. Before you start, gather a standard garden hose, a bucket, and a screwdriver or wrench. Here’s how to do it safely:

Step 1: Turn off the power or gas supply

For electric water heaters, switch off the breaker at your service panel. For gas models, turn off the gas supply at the source. Never attempt to drain a water heater that is still actively heating—this is a critical safety step.

Step 2: Let the water cool

Allow the water inside the tank to cool for at least a couple of hours. Hot water exiting the drain valve can cause serious burns.

Step 3: Shut off the cold water supply

Locate the cold water shut-off valve above the tank and turn it off to stop new water from entering during the drain.

Step 4: Connect a garden hose to the drain valve

The drain valve is located near the base of the tank. Attach a garden hose and direct the other end to a floor drain, a large bucket, or outdoors. Keep in mind that draining takes roughly 20–25 minutes.

Step 5: Open a hot water faucet indoors

Turn on a hot water tap somewhere in your home. This prevents a vacuum from forming in the pipes and allows the tank to drain more freely.

Step 6: Open the drain valve and inspect the water

Open the drain valve and let the water flow out. If the draining water looks cloudy or contains visible particles, the tank needs a full flush.

Step 7: Flush out remaining sediment

To dislodge stubborn buildup, turn the cold water supply on and off several times. This creates pressure changes that help break sediment loose. Continue until the water runs completely clear.

Step 8: Close the drain valve and refill the tank

Once the water runs clear, close the drain valve, remove the hose, and reopen the cold water supply to refill the tank. Keep the indoor hot water faucet open until water flows steadily, then close it.

Step 9: Restore power or gas

Once the tank is full, turn the electricity back on at the breaker—or relight the pilot light for gas models following the manufacturer’s instructions.

One more check: The Department of Energy recommends testing your temperature and pressure relief (T&P) valve annually. This safety device prevents dangerous pressure buildup inside the tank. If it’s not functioning correctly, contact a licensed plumber.

Benefits of Annual Maintenance

Committing to a regular flush schedule pays off in several concrete ways:

  • Extended unit lifespan: Sediment that sits undisturbed accelerates corrosion and can lead to premature tank failure. Routine flushing removes this buildup before it causes irreversible damage.
  • Improved energy efficiency: When sediment coats the bottom of the tank, the heating element has to work harder to transfer heat to the water. Clearing it out reduces energy consumption—and lowers your monthly utility bill.
  • Consistent hot water supply: A clean tank heats water faster and holds temperature more reliably, which means fewer cold surprises mid-shower.
  • Reduced repair costs:Small maintenance tasks performed regularly are far less expensive than emergency repairs or full unit replacements.

Most experts recommend flushing your water heater at least once per year. If your home has hard water—water with a high mineral content—flushing every six months is a smarter approach. Harder water means faster sediment accumulation, and Indianapolis-area homes are no exception.

Frequently Asked Questions

How often should I flush my water heater?

For most households, once a year is sufficient. Homes with hard water or older units benefit from flushing every six months to prevent significant buildup.

Is it safe to flush a water heater myself?

Yes, for most homeowners. The key safety precautions are turning off the power or gas supply before starting and allowing the water to cool before draining. If you’re ever uncertain, call a licensed plumber.

What if the water never runs clear?

If you flush the tank repeatedly and the water still appears discolored or cloudy, the sediment buildup may be too severe to address with a standard flush. This is a sign to contact a professional, as the unit may need further service or replacement.

My drain valve appears to be clogged—what should I do?

A clogged drain valve is a common issue in tanks that haven’t been flushed in years. Do not force it open. A plumber can safely clear or replace the valve without damaging the tank.

How long does a water heater last?

With proper maintenance, a tank-style water heater typically lasts 8–12 years. If your unit is more than 10 years old and showing persistent issues, it may be more cost-effective to replace it.

When should I call a professional instead of doing it myself?

Call a licensed plumber if: the unit doesn’t drain after opening the valve, you notice any leaks around the tank, strange noises persist after flushing, or the T&P valve appears faulty.

Give Your Water Heater the Attention It Deserves

Your water heater quietly powers some of the most important moments of your day. A simple annual flush is one of the most straightforward ways to protect that investment, keep your energy bills in check, and avoid the stress of an unexpected breakdown.

This World Plumbing Day, take the opportunity to show your plumbing system some respect—starting with the appliance that works hardest behind the scenes.

Ready to leave it to the professionals? Schedule water heater maintenance and repair in Indianapolis, Indiana today. Our licensed plumbers provide thorough inspections, tank flushing, and full water heater services to keep your home running smoothly all year long.

Call for a Free Quote

Related Post: Why Your Hot Water Heater Won’t Drain

How to Fix a Running Toilet: Easy DIY Guide

TL;DR: Most running toilets are caused by a faulty flapper, a high water level, or a leaky fill valve. This guide walks you through diagnosing and fixing each issue in under 30 minutes—no plumber required.

Key Takeaways:

  • Check the flapper first—it’s the most common culprit
  • Adjust the float so the water level sits below the overflow tube
  • Replace the fill valve if the water still won’t stop running

Table of Contents:

  1. Understanding Why Your Toilet is Running
  2. Step 1: Inspect the Flapper
  3. Step 2: Adjust the Water Level
  4. Step 3: Repair or Replace the Fill Valve
  5. When to Call a Professional
  6. FAQ
  7. Quick Recap
  8. Schedule Toilet Repair in Indianapolis
Call 317-784-1870 for an Affordable Toilet Running Fix in Indianapolis

Understanding Why Your Toilet is Running

A running toilet is more than an annoyance—it’s a quiet drain on your water bill. According to the U.S. Environmental Protection Agency (EPA), a running toilet can waste up to 200 gallons of water every single day. That’s roughly 6,000 gallons a month, all disappearing down the drain without a single flush.

The good news? The fix is often simpler than you’d expect.

A running toilet is typically caused by one of three things: water leaking from the tank into the bowl through a faulty flapper, a float that’s set too high—allowing water to spill into the overflow tube—or a fill valve that’s no longer shutting off properly. Identifying which issue you’re dealing with is the first step toward fixing it.

Before you do anything else, turn off the water supply valve located at the base of the toilet and remove the tank lid. Set it somewhere safe. Now you’re ready to diagnose.

Step One: Inspect the Flapper

Toilet Flapper
Toilet Flapper

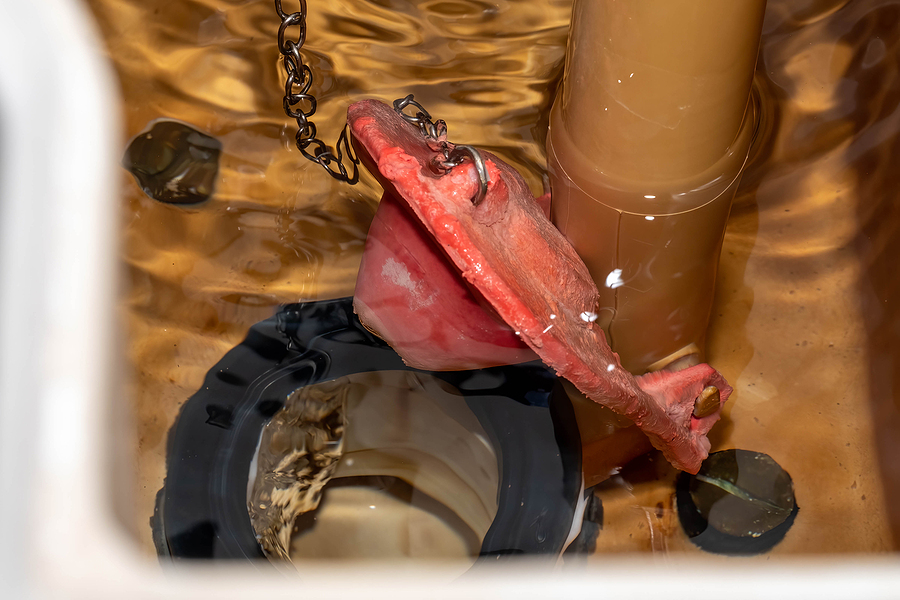
The flapper is the most common cause of a running toilet, so always check here first. The flapper is the rubber seal at the bottom of the tank. Every time you flush, it lifts to let water flow into the bowl, then drops back down to stop the flow. Over time, flappers can warp, crack, or accumulate mineral buildup—and when that happens, they can no longer form a tight seal.

To check if the flapper is leaking:

  1. Add a few drops of food coloring to the tank
  2. Wait 15–30 minutes without flushing
  3. If the color appears in the bowl, your flapper is leaking

Reach into the tank and feel the flapper. It should be soft and flexible. A stiff, brittle, or visibly warped flapper needs replacing. Fortunately, replacement flappers are inexpensive—usually just a few dollars at any hardware store—and most snap on and off in minutes.

While you’re in there, check the chain. The chain connects the flapper to the flush handle. If it’s too long, it can get caught under the flapper and prevent a proper seal. If it’s too short, the flapper won’t close at all. The ideal length leaves about half an inch of slack.

Step Two: Adjust the Water Level

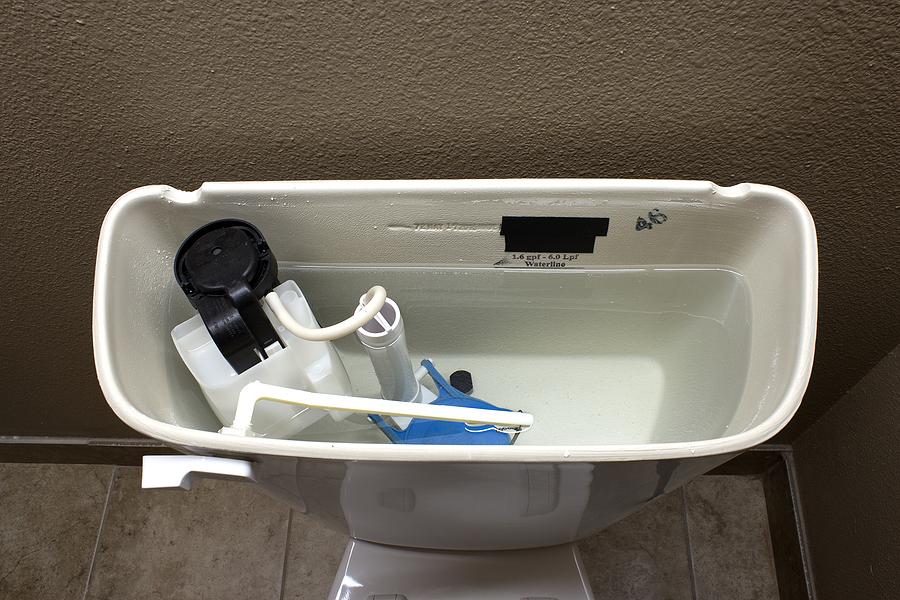
If the flapper isn’t the problem, a water level that’s too high is likely causing water to spill constantly into the overflow tube. Open the tank and look at the overflow tube—the tall open pipe in the middle of the tank. If water is running into or near the top of that tube, your float is sitting too high.

The float is the buoyant device that rises with the water level and tells the fill valve when to shut off. Ideally, the water level should sit one to two inches below the top of the overflow tube. If it’s higher than that, water will drain continuously into the bowl.

To lower the water level:

  1. Locate the float adjustment screw at the top of the fill valve
  2. Turn it counterclockwise to lower the float
  3. Flush and refill the tank to check the new water level
  4. Repeat until the water stops before reaching the overflow tube

Some older toilets use a ball-cock float—a round ball attached to a metal arm. In that case, gently bend the arm downward to lower the float position.

Step Three: Repair or Replace the Fill Valve

Water Supply Fill Valve

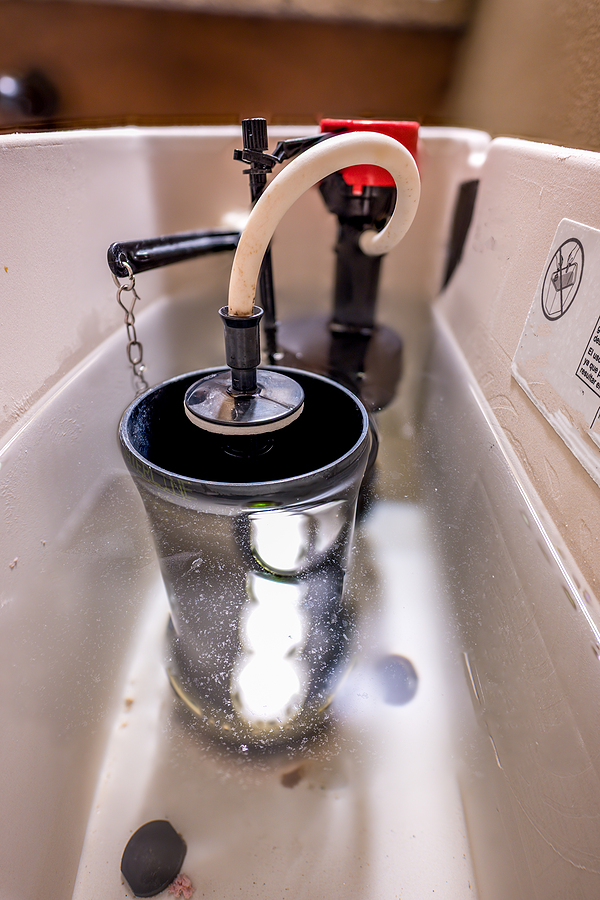
If you’ve adjusted the float and water is still running, the fill valve itself is likely worn out. The fill valve is the tall vertical component that connects to the water supply line and refills the tank after each flush. Inspect the top of the valve—if water is spraying or trickling from it, the internal seal has degraded and replacement is the most reliable solution.

To replace the fill valve:

  1. Turn off the water supply valve at the base of the toilet
  2. Flush to drain as much water from the tank as possible
  3. Use a towel to soak up any remaining water in the tank
  4. Disconnect the supply line from the bottom of the tank
  5. Unscrew and remove the old fill valve
  6. Insert the new valve, following the manufacturer’s instructions
  7. Reconnect the supply line, turn the water back on, and test

Replacement fill valves are widely available at hardware stores, and many come with detailed instructions. If hard water is common in your area, consider a valve that is rated for mineral-heavy environments—it’ll last significantly longer.

When to Call a Professional Plumber for Toilet Repair

Some toilet problems go beyond a worn flapper or a misbehaving float—and it’s important to recognize when DIY repairs have their limits. Contact a licensed plumber if you notice any of the following:

  • Cracked porcelain on the tank or bowl
  • Water leaking at the base of the toilet
  • Persistent running after replacing the flapper and fill valve
  • High water pressure throughout the home, which can cause ongoing toilet issues
  • Toilets manufactured before 1994, which may use significantly more than 1.6 gallons per flush and could benefit from full replacement

Need professional help? Schedule professional toilet repair in Indianapolis with Weilhammer Plumbing Company for fast, reliable service.

FAQ

Why does my toilet run every few minutes?

This is called “phantom flushing” and it usually means the flapper is leaking slowly. Water gradually seeps from the tank into the bowl until the level drops low enough to trigger the fill valve. Replacing the flapper typically resolves this.

Why is my toilet running after I flush?

If the toilet keeps running after flushing, the fill valve may not be shutting off properly—often because the float is set too high or the fill valve seal is worn. Work through Steps 2 and 3 above to diagnose the issue.

Why is my toilet running constantly?

Constant running usually means water is either flowing past the flapper into the bowl or spilling into the overflow tube without stopping. Check the flapper seal first, then assess the water level relative to the overflow tube.

Does a running toilet increase my water bill?

Yes, significantly. The EPA notes that a running toilet can waste up to 200 gallons per day—roughly 6,000 gallons per month. Depending on your local water rates, that can add a noticeable amount to your monthly bill.

How much does it cost to fix a running toilet?

DIY repairs are very affordable. A replacement flapper typically costs $5–$15, while a fill valve runs between $10 and $25. If you call a plumber, labor costs vary by location but the repair is generally straightforward and quick for a professional.

Quick Recap:

  • Turn off the water supply valve before inspecting the tank
  • Check the flapper for warping, brittleness, or chain length issues
  • Adjust the float so water levels off 1–2 inches below the overflow tube
  • Replace the fill valve if water continues to run after adjustments
  • Call a professional if you suspect cracked porcelain, base leaks, or persistent issues

Stop the Waste, Lower Your Bill

A running toilet is one of those problems that’s easy to ignore—until you see the water bill. The underlying cause is almost always mechanical, and in most cases, a new flapper or a quick float adjustment is all it takes to solve it.

Work through the steps in this guide and you’ll likely have your toilet running quietly again within the hour. And if the problem turns out to be more complex, don’t hesitate to call in a professional. A small repair today can prevent a much larger plumbing issue down the line.

Ready to get it fixed? Schedule professional toilet repair in Indianapolis and surrounding counties today for fast, reliable service. Our master plumbers know how to approach your toilet running issue with a quick, long-lasting solution.

Call for a Free Quote

Related Post: Do Not Let Your Guests Flush These Things Down the Toilet

Water Softener Maintenance Tips to Avoid Repairs

Water softeners work quietly in the background, transforming hard water into the soft, gentle water your home needs. This continuous operation protects your plumbing, extends appliance life, and improves your daily water experience. However, like any hardworking system, your water softener requires regular maintenance to perform at its best.

Neglecting routine care can lead to decreased efficiency, water quality issues, and ultimately, expensive repairs or premature replacement. Understanding what your water softener needs—and when—empowers you to prevent problems before they start.

TL;DR: Regular water softener maintenance prevents costly repairs and extends your system’s lifespan. Check salt levels monthly, clean the resin bed every few months, sanitize your system periodically, and schedule professional inspections annually. These simple steps keep your water soft and your plumbing protected.

Key Takeaways:

  • Check salt monthly and keep the brine tank at least half full to ensure proper regeneration.
  • Watch for salt bridges by testing with a broom handle if the tank looks full but water feels hard.
  • Clean the resin bed every few months with a specialized cleaner to maintain ion exchange efficiency.
  • Sanitize your system when needed to prevent bacterial growth, especially after extended shutdowns.
  • Schedule annual professional maintenance to catch hidden issues before they become expensive problems.

Table of Contents:

  1. How Often Should You Check Your Salt Levels?
  2. What Are the Signs Your Resin Tank Needs Cleaning?
  3. Why Is It Important to Sanitize Your Water Softener?
  4. When Should You Schedule Professional Maintenance?
  5. Frequently Asked Questions (FAQ)
  6. Quick Recap
  7. Book Water Softener Service in Indianapolis
Call 317-784-1870 For Professional Water Softener Maintenance in Indianapolis

How Often Should You Check Your Salt Levels?

Check your water softener’s salt levels once a month. Keeping the brine tank at least half full ensures your system can properly regenerate and continue softening your water effectively. The regeneration process relies on a concentrated brine solution to recharge the resin beads that remove hardness minerals. Without adequate salt, this critical cycle can’t complete successfully, and hard water problems will return.

While monthly checks work for most households, your specific needs may vary based on water hardness, household size, and how frequently your system regenerates. Systems with demand-initiated regeneration typically use salt more efficiently than those on fixed schedules.

Understanding Salt Bridges and Mushing

During your monthly inspection, don’t just glance at the salt level—check for two common problems that can silently sabotage your softener’s performance.

Salt bridges occur when a hard crust forms in the brine tank, creating an empty space between the water below and the salt above. This prevents the salt from dissolving properly, even though the tank appears full. High humidity, temperature fluctuations, or using the wrong type of salt typically cause bridging. Test for a salt bridge by gently pushing a broom handle into the salt—if it breaks through a crusty layer, you’ve found the problem.

Salt mushing is more problematic. This happens when dissolved salt recrystallizes at the bottom of the tank, forming a thick sludge that blocks water flow and prevents proper regeneration. If your broom handle test doesn’t reveal a bridge but your water is still hard, mushing is likely the culprit.

To prevent both issues, use high-quality salt pellets rather than rock salt, avoid overfilling your brine tank (keeping it half full is ideal), and maintain appropriate humidity levels around your softener.

What Are the Signs Your Resin Tank Needs Cleaning?

Your resin tank needs cleaning when you notice reddish-brown discoloration of the resin beads, decreased water pressure, a metallic taste in your water, or when your system requires more frequent regeneration cycles.

The resin beads inside your water softener are the workhorses of the ion exchange process, capturing calcium and magnesium ions that cause hardness. Over time, these beads can become coated with iron, sediment, and organic compounds that reduce their effectiveness.

Iron fouling is particularly common in areas with well water. When ferrous iron (the dissolved form) oxidizes to ferric iron, it precipitates onto the resin beads as rust-colored deposits. These deposits block exchange sites, reducing your softener’s capacity and allowing hard water to pass through untreated.

Maintaining Your Resin Bed

Clean your resin bed every few months by adding a manufacturer-recommended amount of water softener cleaner to the brine well, then manually initiating a regeneration cycle. The cleaner flushes through the resin during the normal regeneration process, removing accumulated iron, heavy metals, and organic compounds.

Products specifically designed for resin cleaning—such as those containing citric acid or other chelating (ion-grabbing) agents—work more effectively than household cleaners. Never use harsh chemicals like vinegar, bleach, or acid cleaners on the resin itself, as these can damage the beads and reduce their lifespan.

If you have high iron levels in your water (above 0.3 mg/L), consider installing a dedicated iron filter upstream of your softener. This protects your resin investment and maintains consistent softening performance.

Why Is It Important to Sanitize Your Water Softener?

Sanitizing your water softener prevents bacterial growth that can develop in the warm, moist environment of the resin tank, which regular regeneration cycles don’t eliminate. Water softeners create ideal conditions for microorganisms to thrive. While the salt backwash cycle effectively recharges the resin beads, it doesn’t disinfect them. Over time, bacteria and algae can colonize the resin bed, producing unpleasant odors, affecting water taste, and potentially creating health concerns.

You should sanitize your water softener whenever the valve body has been exposed to air during service, after the system has been idle for more than a week, if you notice a foul smell or metallic taste in your water, or according to your manufacturer’s recommended schedule (typically every three months to annually).

Sanitization Methods

Sanitization approaches vary by manufacturer. Some systems use specialized sanitizing packets that are pre-measured and easy to use—simply empty one into the brine tank and allow the next regeneration cycle to distribute the sanitizer throughout the system.

If your manufacturer recommends bleach, exercise caution with quantities. A general guideline is approximately ¼ cup (2 fluid ounces) of unscented household bleach per cubic foot of resin for most residential softeners. Add the bleach to the brine well, run a manual regeneration cycle, and allow the bleach solution to contact the resin beads for about an hour. Follow with an additional regeneration cycle to thoroughly rinse away any remaining bleach.

Important: Using too much bleach or leaving it in contact with the resin for extended periods can damage the beads. Always consult your owner’s manual for specific recommendations for your model, as procedures and safe concentrations vary.

Never use harsh chemicals on your softener’s exterior components—mild soap and warm water are sufficient for cleaning the outside of the unit.

When Should You Schedule Professional Maintenance?

Schedule professional water softener maintenance annually to identify and address issues before they escalate into costly repairs or system failure. While you can handle routine tasks like checking salt levels and adding resin cleaner, a trained water softener repair service brings expertise and specialized tools that ensure your system operates optimally. Professional inspections become especially important around the five-year mark, when components may begin showing wear.

What Professionals Check

During a comprehensive maintenance visit, technicians inspect critical components including the control valve, venturi valve, seals, O-rings, and drain line. They verify proper regeneration timing, test water hardness levels, check for leaks, assess resin condition, and clean or replace parts as needed.

The venturi valve, which creates the suction needed to move brine during regeneration, deserves particular attention. This small but crucial component can become clogged with sand, sediment, and mineral deposits. While you can clean it yourself twice yearly by unscrewing the cover and washing the internal parts in soapy water, professionals have the experience to spot early signs of wear that might escape untrained eyes.

Professional technicians can also evaluate whether your current softener still meets your household’s needs. Changes in family size, water usage patterns, or incoming water quality may mean your system is working harder than it should—or that it’s time for an upgrade.

If your water softener has been in service for more than ten years, shows signs of significant wear, requires frequent repairs, or can no longer keep up with your household’s demands, a professional assessment helps you make informed decisions about repair versus replacement.

Frequently Asked Questions (FAQ)

How often should my water softener regenerate?

Regeneration frequency depends on your water hardness, household water consumption, and system capacity. Modern demand-initiated systems regenerate based on actual water usage, typically every few days to once weekly. Older timer-based systems regenerate on a fixed schedule regardless of need. If you notice your system regenerating daily or multiple times per day, consult a professional—this could indicate a programming issue, capacity problem, or leak.

What water hardness level requires a softener?

Water hardness above 7 grains per gallon (gpg) or 120 mg/L is generally considered hard enough to benefit from softening. However, even moderately hard water (3-7 gpg) can cause scale buildup over time. Have your water tested to determine your specific hardness level and whether softening would benefit your household.

Can I use any type of salt in my water softener?

Use high-purity salt pellets or solar salt for best results. Avoid rock salt, which contains higher levels of impurities that can lead to tank residue and maintenance issues. Some households with specific concerns, such as sodium-restricted diets, may use potassium chloride as an alternative, though it’s more expensive and less efficient. Specialty salts formulated to address iron or rust are available if your water contains elevated iron levels.

Why does my water still feel hard after adding salt?

Several issues can cause this problem. Check for salt bridges or mushing first. If the brine tank issue isn’t the culprit, your resin may be fouled with iron or other contaminants and need cleaning. Other possibilities include incorrect regeneration settings, a malfunctioning control valve, exhausted resin that needs replacement, or water bypassing the softener entirely. A professional inspection can diagnose the specific cause.

How long should a water softener last?

With proper maintenance, a quality water softener typically lasts 15-20 years. The resin bed itself may need replacement every 10-15 years depending on water quality and maintenance practices. Electronic components and valves may require service or replacement more frequently. Regular professional maintenance significantly extends system life.

Quick Recap:

  • Check salt levels monthly and maintain at least a half-full brine tank
  • Test for salt bridges using a broom handle if the tank looks full but water is hard
  • Use high-quality salt pellets to minimize bridging and mushing issues
  • Clean the resin bed every few months with a specialized water softener cleaner
  • Watch for iron fouling signs: rust-colored water, metallic taste, decreased pressure
  • Sanitize your system periodically following manufacturer guidelines
  • Clean the venturi valve twice yearly to maintain proper brine suction
  • Schedule professional inspections annually, especially after five years of use
  • Never use harsh chemicals like vinegar or acid on resin beads or system components
  • Consider upgrading if your 10+ year old system requires frequent repairs

Conclusion

Regular maintenance protects your investment and ensures your family continues enjoying the benefits of soft water. While these routine tasks are manageable for most homeowners, some situations require professional expertise.

If you’re experiencing persistent hard water problems, unusual odors or tastes, frequent system errors, or your water softener is approaching or exceeding its expected lifespan, it’s time to consult a professional.

Need expert water softener repair or replacement in Indianapolis? Our experienced technicians provide comprehensive maintenance, honest assessments, and quality solutions tailored to your home’s needs. Contact us today to schedule your service and keep your water softener performing at its best.

Call Now to Inquire

Related Post: Should You Replace Your 10-Year-Old Water Softener?

Water Heater Troubleshooting: How to Figure Out What’s Wrong

There is nothing quite as jarring as stepping into a shower expecting warmth, only to be hit by a blast of icy water. It’s a harsh reminder of how much we rely on our water heaters for daily comfort. While these appliances are generally reliable workhorses, they aren’t immune to wear and tear.

Strange noises, mysterious puddles, and lukewarm water are all signs that your unit needs attention. Understanding these symptoms can help you decide whether a quick DIY fix is possible or if it’s time to call in a professional. Ignoring these signs often leads to bigger, more expensive problems down the road.

This guide covers the most common water heater issues homeowners face. We will walk you through safe diagnostic steps to help you get your hot water—and your comfort—back on track.

TL;DR and Key Takeaways:

  • Popping noises usually indicate sediment buildup in the tank, which traps steam bubbles.
  • Leaks from the bottom often signal a loose drain valve or, in worse cases, internal tank corrosion requiring replacement.
  • No hot water is frequently caused by a tripped circuit breaker (electric) or an extinguished pilot light (gas).
  • Rotten egg smells are caused by bacteria reacting with a magnesium anode rod; switching to aluminum-zinc can fix this.
  • Safety first: Always turn off power or gas before inspecting your unit. If you smell gas, leave the house immediately.

Table of Contents:

  • Why is my water heater making noise?
  • Why is my water heater leaking from the bottom?
  • Why do I have no hot water?
  • Why does my water smell like sulfur?
  • Frequently Asked Questions
  • Quick Recap
  • Conclusion
  • Water Heater Repair in Indianapolis
Call 317-784-1870 for Professional Water Heater Repair in Indianapolis

Why is My Water Heater Making Noise?

Noises like popping, rumbling, or banging are typically caused by sediment buildup at the bottom of the tank or thermal expansion.

As water heaters age, minerals like calcium and lime separate from the water and settle at the bottom of the tank. This layer of sediment acts as an insulator between the heating element (or burner) and the water. When the burner heats up, water trapped underneath the sediment boils and turns into steam bubbles. These bubbles eventually burst through the sediment layer, creating a loud popping or rumbling sound—much like a pot of boiling water with a lid rattling on top.

While the noise itself might seem harmless, the sediment forces your heater to work harder, which can overheat the tank’s bottom and damage the protective lining.

Other common noises:

  • Sizzling: This is often caused by condensation dripping onto the hot burner, which is common in gas units when they are first installed or during cold weather.
  • Water Hammer: If you hear a loud banging in the pipes when a faucet shuts off, this is likely “water hammer.” It’s caused by high water pressure stopping suddenly. Installing a water pressure regulator or an expansion tank can solve this.
  • Screeching: This high-pitched sound can indicate a restricted water flow, often due to a partially closed valve.

How to fix it:

Flushing the tank is the standard solution for sediment buildup. This involves attaching a garden hose to the drain valve and letting the water run until it clears. If the noise persists after flushing, the sediment may have hardened into scale, which is harder to remove and might require professional descaling.

Why is My Water Heater Leaking from the Bottom?

Leaks from the bottom are usually caused by a loose drain valve, high pressure triggering the relief valve, or internal tank corrosion.

Finding a puddle of water around your heater is alarming, but it doesn’t always mean you need a new unit. First, check the drain valve at the very bottom. If it feels wet, it might just need tightening with a wrench. If tightening doesn’t stop the drip, the washer inside may be worn out, meaning the valve needs replacing.

Next, look at the Temperature and Pressure (T&P) Relief Valve. This safety device sits higher up on the tank and has a discharge tube running down to the floor. If water is dripping from this tube, the valve is doing its job—releasing excess pressure or temperature to prevent an explosion. However, if it leaks constantly, the valve itself might be faulty, or your home’s water pressure is too high.

The worst-case scenario:

If the water appears to be seeping directly from the tank’s seams or the metal casing itself, this indicates internal corrosion. Glass-lined tanks eventually crack or rust through. Once the tank structure is compromised, it cannot be repaired. In this case, shutting off the water supply and replacing the entire unit is the only option.

Why Do I Have No Hot Water?

A lack of hot water is most often due to a tripped circuit breaker (for electric units) or an extinguished pilot light (for gas units).

Before you panic, check the simplest culprits. If you have an electric water heater, go to your electrical panel and ensure the breaker hasn’t tripped. If the breaker is fine, check the “Reset” button located on the heater’s upper thermostat (you will need to remove a small access panel). This button, known as the High Limit switch, trips if the water gets too hot. If it keeps tripping, you likely have a faulty thermostat or heating element.

For gas water heaters, the most common culprit is the pilot light:

  • Check the pilot: Follow the instructions on the manufacturer’s label to relight it. You typically turn the knob to “Pilot,” hold it down, and press the igniter button.
  • Thermocouple issues: If the pilot lights but goes out as soon as you release the knob, the thermocouple—a safety sensor that detects the flame—may be dirty or broken.
  • Airflow: Modern gas units have thermal switches that shut down the system if the burner isn’t getting enough air. Check that the air intake screens at the bottom aren’t clogged with dust or lint.

Why Does My Water Smell Like Sulfur?

A “rotten egg” smell is caused by bacteria in the water reacting with the magnesium anode rod inside your tank.

This issue is rarely a fault with the water heater itself but rather a chemical reaction. Most tanks come with a “sacrificial” anode rod made of magnesium. This rod is designed to rust so that your tank doesn’t. However, if your water supply has high levels of sulfur or specific bacteria, the magnesium rod reacts with them to produce hydrogen sulfide gas. This creates a potent sulfur odor, especially in the hot water supply.

How it can be fixed:

  • Flush the system: Using a chlorine bleach solution to flush the tank can kill the bacteria, though the smell often returns.
  • Replace the rod: The most permanent fix is to replace the magnesium anode rod with one made of an aluminum-zinc alloy. This alloy resists the chemical reaction that causes the odor while still protecting your tank from corrosion.

Frequently Asked Questions

How long do water heaters typically last?

Most traditional tank-style water heaters last between 8 and 12 years. Tankless models can last significantly longer, often up to 20 years with proper maintenance.

Is it safe to relight the pilot light myself?

Yes, provided you follow the manufacturer’s instructions carefully. However, safety is paramount. If you smell gas, do not attempt to light it. Turn off the gas supply and leave the building immediately, then call your utility company.

Can I replace a T&P valve myself?

Replacing a T&P valve is a manageable DIY task for those comfortable with plumbing basics. However, because this is a critical safety feature that prevents tank explosions, incorrect installation can be dangerous. If you are unsure, hire a professional for water heater repair.

How often should I flush my water heater?

Manufacturers generally recommend flushing your tank once a year. If you live in an area with hard water, you may need to do it every six months to prevent sediment buildup.

Quick Recap:

  • Noise: Popping sounds usually mean sediment buildup; try flushing the tank.
  • Leaks: Check the drain valve and T&P valve first. Seam leaks mean you need a replacement.
  • No Heat (Electric): Check the circuit breaker and the red “Reset” button on the thermostat.
  • No Heat (Gas): Check if the pilot light is out or if the air intake is clogged.
  • Smell: A sulfur smell is a reaction with the anode rod; swap magnesium for aluminum-zinc.

Conclusion

Troubleshooting your water heater doesn’t have to be a guessing game. By listening to the sounds your unit makes and inspecting it for leaks or smells, you can often identify the root cause quickly. Regular maintenance, like annual flushing, can prevent many of these issues from disrupting your day.

However, water heaters involve high voltage, gas lines, and scalding water. If you are uncomfortable performing any diagnostics, or if your tank is showing signs of major failure like severe corrosion, it is always safer to call an expert.

Need professional help in Indianapolis? Don’t let a cold shower ruin your morning. If you are in Indianapolis or the surrounding areas and need reliable water heater repair or replacement, contact our team today. We are here to restore your comfort safely and efficiently.

Call Now to Book Service

Related Post: Rheem Water Heater Warranty: What You Need to Know Before You Buy

Essential Plumbing Tools Every Homeowner Should Have

TL;DR: Plumbing emergencies rarely happen at convenient times. This guide outlines the essential tools every Indianapolis homeowner should keep on hand to handle basic repairs, save money on service calls, and prevent minor leaks from becoming major disasters. It also covers step-by-step usage and when to call a professional.

Key Takeaways:

  • Preparation is key: owning the right tools can stop a plumbing emergency in its tracks.
  • Know your tools: specific jobs require specific tools, like using a flange plunger for toilets and a cup plunger for sinks.
  • Respect your limits: knowing when to put down the wrench and call a professional can save your home from water damage.
  • Safety first: always know where your main water shut-off valve is located.

Table of Contents:

  1. Why Every Homeowner Needs Plumbing Tools
  2. Essential Tools to Have
  3. What is a Plunger and How Do I Use It?
  4. What is Plumber’s Tape and How Do I Use It?
  5. What is an Adjustable Wrench and How Do I Use It?
  6. What is a Basin Wrench and How Do I Use It?
  7. What is a Pipe Wrench and How Do I Use It?
  8. What are Pliers and How Do I Use Them?
  9. What is a Hacksaw and How Do I Use It?
  10. What is a Drain Snake and How Do I Use It?
  11. What is a Wet/Dry Vacuum and How Do I Use It?
  12. When Should I Call a Professional Plumber?
  13. FAQ
  14. Conclusion

Why Every Homeowner Needs Plumbing Tools

Owning a home is a rewarding experience, but it comes with the responsibility of maintenance. A sudden leak or a clogged drain can cause significant stress—and potential damage—if you aren’t prepared.

While major installations and complex repairs should always be handled by licensed professionals, many minor issues are solvable with a well-stocked toolbox. Having these essential plumbing tools ready allows you to act fast during an emergency, potentially saving you hundreds of dollars in water damage and emergency service fees.

Essential Plumbing Tools

  • Plunger
  • Plumber’s Tape
  • Adjustable Wrench
  • Basin Wrench
  • Pipe Wrench
  • Pliers
  • Hacksaw
  • Drain Snake
  • Wet/Dry Vacuum
Call 317-784-1870 To Get in Touch With Local Plumbers in Indianapolis Indiana

What is a Plunger and How Do I Use It?

The plunger is the first line of defense against clogs. However, not all plungers are created equal. You should ideally own two types: a cup plunger (for flat surfaces like sinks and tubs) and a flange plunger (for toilets).

How to use it:

  • Choose the right plunger: Use a flange plunger for toilets. The extra flap of rubber creates a better seal in the curved drain.
  • Create a seal: Ensure there is enough water in the bowl or basin to cover the rubber cup. If the water level is too low, add water.
  • Plunge correctly: Place the cup over the drain to create a tight vacuum seal. Push down and pull up vigorously for about 20 seconds, maintaining the seal the entire time. The suction is what dislodges the clog, not just the pushing pressure.

What is Plumber’s Tape and How Do I Use It?

Also known as PTFE tape or Teflon tape, this thin white tape is essential for preventing leaks at threaded connections. It lubricates the threads for a tighter fit and acts as a sealant.

How to use it:

  1. Clean the threads: Wipe the threads of the pipe clean before applying.
  2. Wrap clockwise: This is the most crucial step. hold the pipe in your left hand and the tape in your right. Wrap the tape in the direction the pipe will turn (clockwise, or “righty-tighty”). If you wrap it backward, the tape will unravel when you tighten the fitting.
  3. Don’t overdo it: Wrap the tape around the threads 2 to 3 times. Pull it taut so it settles into the grooves, then snap it off.

What is an Adjustable Wrench and How Do I Use It?

This versatile tool acts as a distinct “all-in-one” solution for hex-shaped nuts. Because the jaw size is adjustable, you don’t need a full set of fixed wrenches for most basic plumbing tasks, such as tightening a supply line or replacing a showerhead.

How to use it:

  1. Size it up: Place the jaws over the nut and tighten the thumb screw until the wrench fits snugly. A loose fit can round off the edges of the nut, making it impossible to remove.
  2. Turn correctly: Pull the handle toward the adjustable jaw side for maximum strength and to prevent the wrench from slipping.

What is a Basin Wrench and How Do I Use It?

If you have ever tried to tighten a faucet mounting nut underneath a sink, you know it is a cramped, dark, and frustrating space. A basin wrench is a specialized tool with a long shaft and a swiveling jaw designed specifically for this hard-to-reach area.

How to use it:

  1. Position the head: Pivot the jaw of the wrench so it is perpendicular to the shaft.
  2. Latch onto the nut: Reach up behind the sink basin and clamp the jaws onto the mounting nut.
  3. Turn the shaft: Use the T-bar handle at the bottom to turn the shaft, tightening or loosening the nut far above your head.

What is a Pipe Wrench and How Do I Use It?

These large, heavy tools are designed for gripping and turning round iron or galvanized steel pipes. They have serrated teeth that dig into the metal for a secure grip.

How to use it:

  1. Adjust the gap: Leave a small gap between the back of the hook jaw and the pipe. The wrench grips by wedging against the pipe, not by compressing it like a clamp.
  2. Protect the finish: Never use a pipe wrench on shiny fixtures or plated pipes (like chrome), as the teeth will permanently damage the finish. Use a strap wrench or a cloth barrier for those items.

What are Pliers and How Do I Use Them?

specifically, tongue-and-groove pliers (often called Channellocks) are vital. These have adjustable jaws that can open wide to grip large irregular objects, making them perfect for many plumbing fittings.

How to use them:

  1. Adjust the size: Open the jaws and slide the pivot point to the groove that matches the size of the object you are gripping.
  2. Grip firmly: The long handles provide excellent leverage. Squeeze the handles to maintain a firm grip while turning.

What is a Hacksaw and How Do I Use It?

A hacksaw is used for cutting through metal pipe, plastic (PVC) pipe, screws, and bolts. It is a necessary tool if you are replacing sections of piping or removing stubborn, rusted nuts that won’t turn.

How to use it:

  • Secure the item: Always clamp the pipe or object you are cutting to prevent it from rolling.
  • Apply pressure forward: Hacksaw blades cut on the push stroke. Apply downward pressure as you push forward, and ease up as you pull back.
  • Keep it straight: Use slow, steady strokes to ensure a clean, square cut.

What is a Drain Snake and How Do I Use It?

When the plunger fails, the drain snake (or hand auger) is your next best option. It is a long, flexible metal cable that goes deep into the pipe to break up or retrieve clogs.

How to use it:

  1. Feed the cable: Loosen the thumbscrew and push the cable into the drain by hand until you feel resistance (the clog).
  2. Rotate and push: Tighten the thumbscrew. Rotate the handle clockwise while gently pushing forward. This helps the tip of the snake bore into the obstruction.
  3. Retrieve or break: If you hook the clog (like hair), pull it out. If it’s a solid mass, the snake may break it up so it can flush away. Warning: Do not force the snake if it hits a hard stop; you could damage the pipe.
Call 317-784-1870 For Professional Plumbing Repair in Indianapolis

What is a Wet/Dry Vacuum and How Do I Use It?

While not strictly a “repair” tool, a wet/dry vac is indispensable for the cleanup phase. Plumbing repairs are messy, and a burst pipe can leave gallons of water on your floor in minutes.

How to use it:

  1. Prepare for water: Remove the paper filter (used for dry dust) before sucking up water.
  2. Extract water: Use the vacuum to remove water from a toilet bowl before replacing the wax ring, or to suck up standing water from a leak to prevent floor damage and mold growth.

When Should I Call a Professional Plumber?

While these tools empower you to handle minor issues, some situations require the expertise of a licensed professional. In Indianapolis, where older homes and freezing winters present unique challenges, knowing when to call for help is crucial.

You should contact a professional if:

  • Sewage backup: If water backs up into your bathtub when you flush the toilet, you may have a main sewer line blockage. This is a health hazard requiring professional equipment.
  • Frozen pipes: If you suspect a pipe has frozen, improper thawing can cause it to burst. Professionals have the tools to thaw frozen pipes safely.
  • No hot water: Troubleshooting water heaters (especially gas units) can be dangerous.
  • Low water pressure: If pressure drops throughout the entire house, it could indicate a major leak or municipal supply issue.
  • Gas smells: If you smell sulfur or rotten eggs, evacuate immediately and call the utility company and a master plumber.

FAQ

What are the most common plumbing problems homeowners face?

The most frequent issues include dripping faucets, slow-draining sinks, clogged toilets, and running toilets. Many of these can be fixed with the tools listed above.

How can I prevent plumbing issues?

Regular maintenance is key. Avoid pouring grease down the kitchen sink, use hair catchers in shower drains, and insulate your pipes before the Indianapolis winter sets in.

What should I do in a plumbing emergency?

The very first step is to shut off the main water supply to the house. Every family member should know where this valve is located (usually in the basement, crawl space, or near the water meter).

How often should I have my plumbing system inspected?

It is recommended to have a professional inspection once a year, or if you purchase an older home. This can catch hidden leaks or corrosion before they become major failures.

Quick Recap

  • Plumbing emergencies can be minimized by taking proactive steps, such as knowing where the main water valve is located and ensuring it can be shut off quickly in times of need.
  • Regular annual inspections by a professional plumber are essential to prevent hidden leaks, corrosion, and other potential issues.
  • Whether you’re dealing with an urgent emergency or practicing routine maintenance, these steps ensure the safety and functionality of your plumbing system.

Conclusion

Building a basic plumbing toolkit is an investment in your home. By keeping tools like a plunger, adjustable wrench, and drain snake on hand, you can handle simple repairs confidently and swiftly. However, always prioritize the safety of your home and family. If a job feels too big or dangerous,

Need Reliable Plumbing Assistance in Indianapolis? Don’t wait until a minor issue turns into a major problem. Contact our team of professional plumbers today for expert service! Whether it’s routine inspections, emergency repairs, or system upgrades, we’re here to help. Call Us Now or Schedule Your Appointment Online to safeguard your home’s plumbing.

Related Post: DIY Plumbing Repair: The Do’s and Don’ts