5 Clear Signs Your Water Softener Isn’t Working Properly

Your morning shower should leave you feeling refreshed, not wondering why your skin feels dry and your hair looks dull. When your water softener stops working effectively, these frustrating symptoms are often the first clues that something’s wrong with your system.

A properly functioning water softener transforms hard water into soft, mineral-free water that protects your plumbing, extends appliance life, and makes daily tasks more pleasant. However, like any mechanical system, water softeners can develop problems that compromise their effectiveness.

Recognizing the warning signs early can save you from costly repairs and prevent the frustration of dealing with persistent hard water problems. Understanding when your system needs attention—and when to tackle issues yourself versus calling a professional—helps you maintain consistently soft water throughout your home.

Call 317-784-1870 For Affordable Water Softening Service Near Indianapolis

Common Signs Your Water Softener Needs Attention

1. Hard Water Symptoms Return

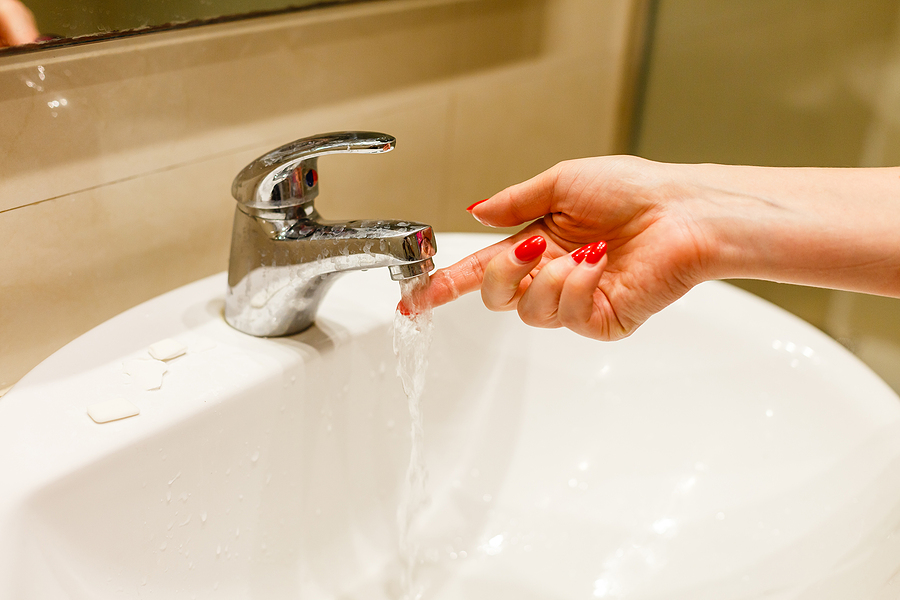
The most obvious indicator of water softener problems is the return of hard water signs throughout your home. You might notice soap scum building up in your shower, difficulty getting dishes clean, or that familiar squeaky feeling on your skin after washing.

When hard water treatment fails, mineral deposits begin accumulating again. Your laundry may feel stiff and look dingy, while your hair loses its softness and shine. These symptoms often develop gradually, making them easy to overlook until they become noticeable problems.

2. Scale Buildup on Fixtures and Appliances

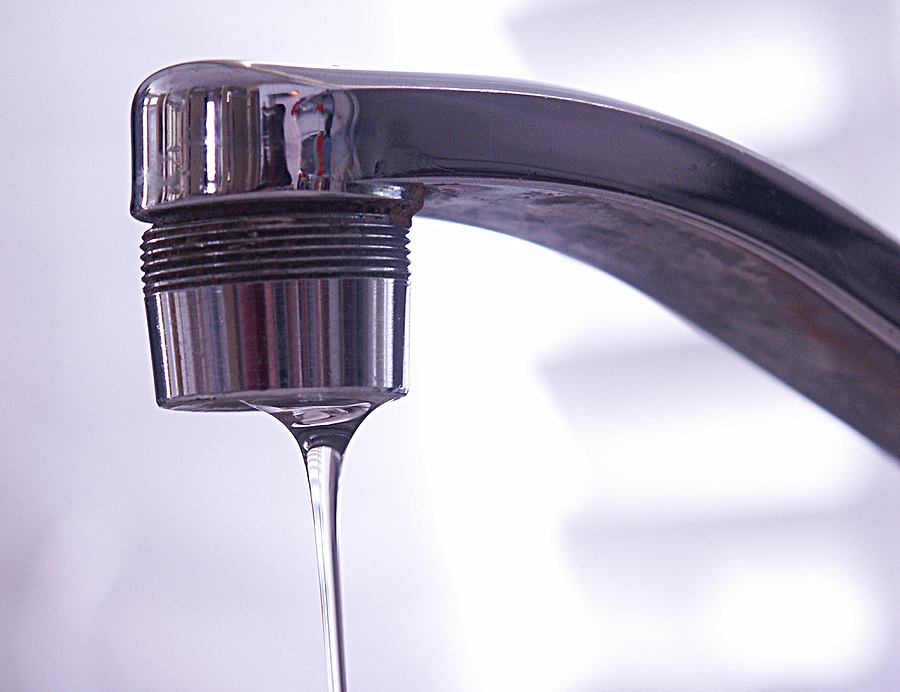
White, chalky deposits around faucets, showerheads, and inside appliances signal that minerals are no longer being properly removed from your water supply. This scale buildup can clog aerators, reduce water pressure, and damage expensive appliances like dishwashers and washing machines.

Check your coffee maker, water heater, and other water-using appliances for mineral accumulation. Even small amounts of scale indicate your water softener isn’t performing optimally.

3. Changes in Water Taste or Appearance

Your water might develop a metallic taste, appear cloudy, or have an unusual odor when your softener malfunctions. These changes often accompany mechanical issues within the system or problems with the resin bed that removes minerals from your water.

Iron-rich water may leave reddish-brown stains in toilets and sinks, while high mineral content can make water taste bitter or salty. Any sudden changes in your water’s sensory qualities warrant immediate investigation.

4. Unusual System Noises

Water softeners typically operate quietly, so grinding, banging, or continuous running sounds indicate mechanical problems. These noises often signal issues with the control valve, motor, or internal components that require professional water softener repair.

Pay attention to when these sounds occur during the water softener regeneration cycle. Timing can help identify whether the problem involves the brine tank, resin tank, or control system.

5. Excessive Salt Usage or Salt Bridging

If you’re adding water softening salt more frequently than usual, your system may be regenerating too often due to a malfunction. Conversely, salt that remains unused in the brine tank suggests the regeneration process isn’t occurring properly.

Salt bridging—when salt forms a hard crust above the water level in the brine tank—prevents proper regeneration and is a common water softener problem that affects performance.

DIY Tests to Check Your Water Softener Function

Soap Lather Test

Fill two identical glasses with water—one from a tap before your water softener and another from a tap after the system. Add equal amounts of liquid dish soap to each glass and shake vigorously. The softened water should produce significantly more lather and bubbles. Poor lathering in the treated water indicates your softener isn’t working effectively.

Hard Water Test Kit

Commercial hard water test kits provide precise measurements of mineral content in your water. Test both your incoming water supply and treated water to compare hardness levels. Your softened water should register between 0-3 grains per gallon of hardness for optimal performance.

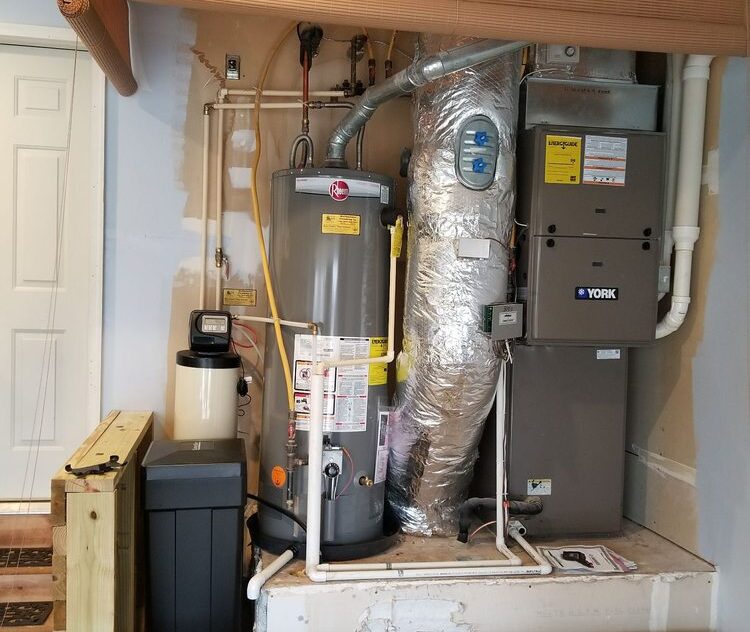
Visual Inspection of Your System

Examine your brine tank for salt bridging by gently pushing down on the salt surface. It should give way easily. Check that the water level in the tank sits below the salt level. Inspect connections for leaks and ensure the system appears to cycle through its regeneration process.

Water Spot Test

Clean a glass surface with softened water and allow it to air dry naturally. Excessive water spots or mineral residue on the dried surface suggests hard water problems that your softener should be addressing.

Request a Water Softener Repair Estimate Today!

When to Call a Professional for Water Softener Repair

Recurring Hard Water Symptoms

If hard water signs persist despite your DIY troubleshooting efforts, professional water softener inspection can identify underlying issues that aren’t immediately apparent. Persistent problems often indicate component failures or system sizing issues.

Mechanical Problems and Unusual Noises

Grinding or banging sounds from your unit typically indicate mechanical issues requiring expert attention. These noises may signal problems with the control valve, motor, or internal mechanisms that need specialized tools and knowledge to repair properly.

System Age and Performance Decline

Water softeners older than 10-15 years may require professional evaluation to determine whether repair or water softener replacement makes more economic sense. Aging systems often develop multiple issues simultaneously that are best addressed by experienced technicians.

Complex Internal Issues

Electrical faults, valve replacements, and resin bed problems require technical expertise and specialized parts. Attempting these repairs yourself can void warranties and potentially cause more extensive damage.

Water Quality Changes and Safety Concerns

Sudden changes in water taste, odor, or appearance may indicate contamination issues that require professional testing and remediation. These situations can affect your family’s health and need immediate expert attention.

Essential Maintenance Tips for Optimal Performance

Salt Management

Maintain your brine tank with high-quality water softening salt, keeping the level at least one-third full. Use salt specifically designed for water softeners to minimize impurities that can cause bridging and reduce system efficiency.

Check your salt level monthly and add more before the tank becomes completely empty. The type of salt you choose—whether pellets, crystals, or blocks—can affect your system’s performance and maintenance requirements.

Regular Cleaning and Inspections

Clean your brine tank every few months to remove sediment and buildup that can interfere with proper operation. Inspect and clean the injector and venturi valve annually to ensure proper water flow and regeneration.

Monitor your system for unusual noises, changes in performance, or visible issues like leaks or corrosion. Addressing small problems early prevents more expensive repairs later.

Professional Maintenance

Schedule water softener inspection every 1-2 years to catch potential issues before they become major problems. Regular, professional maintenance can extend your system’s life and ensure consistent performance.

Frequently Asked Questions

How often should I add salt to my water softener?

Most households need to add salt every 6-8 weeks, but usage varies based on water hardness, family size, and system capacity. Check your brine tank monthly to determine your specific needs.

What type of salt is best for my water softener?

High-purity salt pellets or crystals work best for most systems. Avoid rock salt, which contains impurities that can damage your softener. Brands like Clack recommend specific salt types for optimal performance.

How long does a water softener typically last?

Well-maintained water softeners typically last 10-15 years. Systems like Clack water softener units are known for durability, but lifespan depends on water quality, usage, and maintenance practices.

Can a water softener remove iron from my water?

Standard water softeners can remove small amounts of dissolved iron (up to 3-5 ppm), but higher concentrations require specialized iron removal systems or pre-treatment before the softener.

Is softened water safe to drink?

Softened water is generally safe to drink, though it contains slightly more sodium due to the ion exchange process. People on sodium-restricted diets should consult their healthcare provider.

What are the benefits of having a water softener?

Water conditioners and softeners protect plumbing, extend appliance life, improve soap effectiveness, reduce cleaning time, and provide softer skin and hair.

RECAP

Recognizing the signs of water softener malfunction empowers you to address issues before they become costly problems. Whether you’re dealing with returning hard water symptoms, unusual system noises, or persistent salt bridging, early intervention can restore your system’s effectiveness and protect your home’s plumbing.

Simple DIY tests help you assess your system’s performance, while understanding when to call professionals ensures complex issues receive proper attention. Regular maintenance prevents many common problems and extends your investment’s lifespan.

Don’t let hard water problems disrupt your daily routine or damage your home’s systems. Schedule a comprehensive water softener inspection today to ensure your system continues protecting your home and family with consistently soft, clean water.

Call Now to Book Service

Related Post: 5 Warning Signs Your Water Softener Needs Immediate Repair

Top Reasons Why Your Gas Water Heater Won’t Light

Nothing ruins your morning routine quite like turning on the hot water tap only to be greeted by an icy stream. When your gas water heater refuses to light, it can disrupt your entire household’s daily activities, from showers to dishwashing. Understanding why your water heater won’t ignite is the first step toward restoring your hot water supply and preventing future water heater problems.

A malfunctioning water heater isn’t just an inconvenience—it’s a signal that something within your heating system needs attention. Whether you’re dealing with a pilot light that won’t stay lit on your Rheem water heater or hearing strange clicking sounds without ignition, these issues often have identifiable causes and solutions.

This comprehensive guide will walk you through the most common reasons behind water heater lighting failures, provide safe DIY troubleshooting steps, and help you determine when it’s time to call for professional hot water repair services.

Call 317-784-1870 to Repair Your Gas Water Heater in Indianapolis

Common Causes of Water Heater Lighting Problems

Understanding what prevents your gas-powered water heater from lighting properly can save you time, money, and frustration. Here are the most frequent culprits behind these heating system failures.

Faulty Thermocouple

The thermocouple acts as a safety device that detects whether your pilot light is burning. When this small sensor fails, it can’t confirm that the pilot light is active, causing the gas valve to shut off as a safety precaution. A malfunctioning thermocouple is one of the leading causes of water heater repair needs.

Signs of a faulty thermocouple include a pilot light that lights initially but extinguishes shortly after, or a pilot light that won’t stay lit despite multiple attempts. You might also notice that the pilot light repeatedly goes out on your Rheem water heater, even when there’s no apparent draft or disturbance.

Gas Supply Issues

Gas-related problems can prevent your water heater from lighting effectively. These issues range from a completely shut-off gas supply to partially blocked gas lines that restrict fuel flow to the burner.

Common gas supply problems include closed gas valves, low gas pressure, or debris in the gas line. You might hear a clicking sound but see no ignition when the gas supply is compromised. Additionally, if you detect a gas smell near your water heater when attempting to light it, this indicates a potential gas leak that requires immediate professional attention.

Pilot Light Problems

The pilot light serves as the ignition source for your water heater’s main burner. When pilot light issues occur, your entire heating system can’t function properly. These problems often manifest as a pilot light that won’t ignite, burns weakly, or produces an unusual flame color.

Environmental factors like strong drafts, dirt accumulation, or improper gas-air mixture can affect pilot light performance. Sometimes, the pilot light assembly itself becomes damaged or misaligned, preventing proper ignition of the main burner.

Electronic Ignition System Failures

Modern water heaters often use electronic ignition systems instead of traditional pilot lights. These systems can experience various malfunctions that prevent proper lighting. Electronic components may fail due to power fluctuations, moisture exposure, or normal wear and tear.

If your Rheem water heater displays an error code on its digital control panel, this often indicates an electronic ignition system problem. These error codes provide valuable diagnostic information that can help identify the specific component requiring attention.

Dirty or Blocked Burner Assembly

Over time, dust, debris, and spider webs can accumulate in your water heater’s burner assembly, obstructing proper gas flow and combustion. This buildup prevents the even distribution of gas, leading to incomplete ignition or no ignition at all.

A dirty burner assembly might cause your water heater to make rumbling noises before failing to light. These sounds indicate that gas is present but isn’t burning efficiently due to blocked passages or contaminated components.

Contact Us for Water Heater Service!

Safe DIY Troubleshooting Steps

Before attempting any water heater inspection or troubleshooting, prioritize your safety with these essential precautions:

Safety First: Always turn off the gas supply to your water heater before beginning any work. Ensure proper ventilation to prevent gas accumulation. If you smell gas at any point, evacuate the area immediately and contact a professional. Never work on electrical components without turning off the power, and always wear safety glasses and gloves.

Check the Gas Supply

Start by verifying that your gas supply is active and properly connected. Locate the gas shut-off valve near your water heater and ensure it’s in the “on” position. Check other gas appliances in your home to confirm that your gas service is functioning normally.

If you’ve recently had gas work done or experienced a service interruption, air might be trapped in the gas lines. This air needs to be purged before your water heater can light properly.

Inspect the Pilot Light

Examine your pilot light assembly for obvious problems. Look for a steady blue flame that covers the tip of the thermocouple. A weak, yellow, or flickering flame indicates adjustment or cleaning needs.

Clean around the pilot light area using a soft brush or compressed air to remove dust and debris. Check that the pilot light orifice isn’t blocked and that the thermocouple is positioned correctly in the flame.

Examine the Thermocouple

Locate the thermocouple near the pilot light assembly. This small copper tube should be positioned so that the pilot flame touches its tip. If the thermocouple appears corroded, bent, or damaged, it likely needs replacement.

You can test the thermocouple’s basic functionality by ensuring it’s properly connected to the gas valve and that the connection is tight. However, testing its electrical output requires specialized equipment best handled by professionals.

Reset Electronic Systems

For water heaters with electronic ignition systems, try resetting the control system. Turn off the power to the unit for several minutes, then restore power and attempt to restart the system according to your manufacturer’s instructions.

Check for error codes on digital displays, as these provide specific diagnostic information. Consult your Rheem water heater manual for error code meanings and recommended actions.

When to Call a Professional

While many water heater issues can be diagnosed through careful observation, certain situations require professional expertise for safe and effective water heater repair.

Gas-Related Concerns

Any situation involving gas leaks, strong gas odors, or suspected gas line problems demands immediate professional attention. These scenarios pose serious safety risks that require specialized training and equipment to address safely.

Professional water heater technicians have the tools and expertise to perform proper gas leak detection, pressure testing, and system repairs while maintaining safety standards.

Complex Component Replacement

Replacing components like thermocouples, gas valves, or electronic ignition systems often requires specialized knowledge and tools. While these parts may seem straightforward, improper installation can create safety hazards or damage your water heater.

Professional water heater installation ensures proper calibration, safety compliance, and warranty protection for new components.

Recurring Problems

If your water heater continues experiencing lighting problems despite your troubleshooting efforts, underlying issues may require professional water heater checkup and diagnosis. Persistent problems often indicate multiple component failures or system design issues.

Professional technicians can perform comprehensive system evaluations to identify root causes and recommend permanent solutions rather than temporary fixes.

Check Out Our Current Water Heater Special!

Preventative Maintenance Tips

Regular maintenance significantly reduces the likelihood of water heater lighting problems and extends your system’s lifespan.

Annual Tank Flushing

Flush your water heater tank annually to remove sediment buildup that can interfere with proper heating and gas flow. Sediment accumulation affects efficiency, increases energy costs, and can contribute to premature component failure.

This maintenance task improves your water heater’s performance while preventing costly repairs and extending its operational life.

Regular Component Inspections

Inspect the anode rod every few years and replace it when necessary to prevent tank corrosion. Check the temperature and pressure relief valve regularly to ensure proper safety system function.

These inspections help identify potential problems before they cause system failures or safety hazards.

Professional Maintenance

Schedule a professional water heater inspection every two years to identify and address potential issues early. Professional maintenance includes comprehensive system evaluation, component testing, and preventative adjustments that homeowners can’t safely perform.

Regular professional maintenance often prevents major repairs while ensuring optimal system performance and safety.

Energy Efficiency Improvements

Insulate your water heater and connecting pipes to reduce heat loss and lower energy bills. Proper insulation also reduces the workload on your heating system, potentially extending component life.

Consider upgrading to energy-efficient models when replacement becomes necessary, as newer systems often feature improved reliability and advanced safety systems.

In Summary

Water heater lighting problems can stem from various causes, ranging from simple pilot light issues to complex electronic system failures. While some troubleshooting steps are safe for homeowners to attempt, many water heater problems require professional expertise to resolve safely and permanently.

Regular maintenance, including annual tank flushing and periodic professional inspections, prevents many common water heater issues while ensuring optimal performance and safety. When problems do arise, prompt attention prevents minor issues from becoming major repairs.

Don’t let water heater problems disrupt your daily routine or compromise your family’s comfort and safety. Contact us for expert water heating repair services that restore reliable hot water to your home while ensuring your heating system operates safely and efficiently.

Call Now to Get Started

Related Post: Why Your Water Isn’t Staying Hot And How to Fix It

How to Fix a Leaky Faucet: A Complete DIY Guide

That persistent drip from your kitchen or bathroom faucet isn’t just annoying—it’s costing you money and wasting precious water. A single dripping faucet can waste over 3,000 gallons of water per year, adding $20 to $200 to your annual water bill. The good news? Most leaky faucet repairs are well within reach for the average homeowner.

Understanding how to fix a leaky faucet yourself can save you between $100 to $300 per repair compared to hiring a professional plumber. More importantly, addressing the issue promptly prevents water damage and reduces your environmental footprint. Whether you’re dealing with a dripping faucet in the kitchen or a leaking faucet handle in the bathroom, this comprehensive guide will walk you through everything you need to know to tackle the repair confidently.

Call 317-784-1870 For Affordable Faucet Repair in Indianapolis

Essential Tools and Materials for Faucet Repair

Before beginning your leaky faucet repair, gather these essential tools and materials. Having everything ready will make the process smoother and more efficient.

Basic Tools Needed:

  • Adjustable wrench
  • Screwdrivers (both Phillips and flathead)
  • Needle-nose pliers
  • Flashlight or headlamp
  • Utility knife
  • Seat wrench (for valve seat repairs)

Common Replacement Parts:

  • O-rings (various sizes)
  • Washers
  • Cartridges (specific to your faucet model)
  • Valve seats
  • Packing nuts
  • Faucet handles (if damaged)

Additional Supplies:

  • Plumber’s grease or silicone lubricant
  • Penetrating oil (like WD-40)
  • Clean rags or towels
  • Bucket or container for water drainage

Step-by-Step Leaky Faucet Repair Instructions

Step 1: Shut Off the Water Supply

Begin every faucet repair by turning off the water supply. Locate the shut-off valves under the sink and turn them clockwise. If you can’t find individual valves, you may need to shut off the main water supply to your home. Turn on the faucet to drain any remaining water from the lines.

Step 2: Identify Your Faucet Type

Different faucet types require different repair approaches. Here are the four main types:

  • Ball Faucet: Single handle with a ball-shaped cap
  • Cartridge Faucet: Single or double handle with a removable cartridge
  • Compression Faucet: Two handles that compress when turned
  • Ceramic Disc Faucet: Single handle with ceramic discs inside

Step 3: Remove the Faucet Handle

For most faucets, you’ll need to remove the handle first. Look for screws under decorative caps or on the handle itself. Some handles may require you to unscrew a packing nut or use gentle pressure to pull them off.

Feeling Overwhelmed? Contact Our Plumbers Today!

Step 4: Access Internal Components

Once the handle is removed, you’ll see the internal mechanisms. For cartridge faucets, remove the retaining clip and pull out the cartridge. For compression faucets, unscrew the packing nut to access the stem and washer assembly.

Step 5: Inspect and Replace Worn Parts

Examine all components for signs of wear, corrosion, or damage. Common culprits include:

  • Worn-out or damaged O-rings
  • Corroded valve seats
  • Cracked washers
  • Mineral buildup on cartridges

Replace any damaged parts with exact matches. Take the old parts to your hardware store if you’re unsure about sizing.

Step 6: Clean and Lubricate

Clean all components thoroughly, removing mineral deposits with white vinegar if necessary. Apply a thin layer of plumber’s grease to O-rings and moving parts before reassembly.

Step 7: Reassemble the Faucet

Reverse the disassembly process, ensuring all components are properly seated and tightened. Don’t overtighten, as this can cause damage or future leaks.

Step 8: Test Your Repair

Turn the water supply back on gradually and test your faucet. Check for leaks both when the faucet is on and off. If you notice any dripping, you may need to tighten connections or replace additional components.

Critical Safety Precautions

Safety should always be your top priority during any plumbing repair. Follow these essential precautions:

  • Always shut off the water supply before beginning work
  • Use proper lighting to see clearly in cramped spaces
  • Wear safety glasses when using tools or cleaning with chemicals
  • Be gentle with old fittings to avoid breaking pipes or connections
  • If you encounter gas lines or electrical connections, stop and consult a professional
  • Keep your work area dry to prevent slips and falls

Troubleshooting Common Repair Challenges

Even with careful preparation, you may encounter some common issues during your leaky faucet repair:

  • Stuck or Corroded Parts: Apply penetrating oil and allow time for it to work. Use gentle heat from a hair dryer if necessary, but avoid excessive force that could crack fixtures.
  • Stripped Screws: Use a screw extractor or drill out the old screw carefully. Replace with a slightly larger screw if the threads are damaged.
  • Continuing Leaks After Repair: Double-check that all O-rings are properly seated and that you’ve replaced all worn components. The issue might be a corroded valve seat that needs professional attention.
  • Water Pressure Issues: If water pressure is too high, it can cause stress on seals and lead to premature failure. Consider installing a pressure regulator if this is a recurring problem.

Prevention Tips for Long-Lasting Faucets

Preventing future leaks is often easier than repairing them. Follow these maintenance tips to extend your faucet’s lifespan:

  • Regular Cleaning: Remove mineral buildup monthly by soaking aerators and showerheads in white vinegar. This prevents blockages that can increase pressure on internal components.
  • Gentle Operation: Teach family members to turn faucets off gently. Excessive force when closing can damage washers and seals.
  • Address Small Issues Quickly: Don’t ignore minor drips or reduced water flow. Early intervention prevents more extensive damage.
  • Annual Plumbing Inspection: Consider having a professional plumbing inspection annually to catch potential issues before they become major problems.
  • Water Quality Management: If you have hard water, consider installing a water softener to reduce mineral buildup that can damage faucet components.

When to Call for Professional Help

While many homeowners can successfully complete basic leaky faucet repairs, some situations require professional expertise. Contact a qualified plumber if you encounter:

  • Leaks that persist after multiple repair attempts
  • Corroded or damaged valve seats that need replacement
  • Pipes or fittings that appear damaged during disassembly
  • Complex installations or unusual faucet designs
  • Any situation where you feel uncomfortable or unsure

Take Action Against Leaky Faucets Today

A dripping faucet may seem like a minor inconvenience, but addressing it promptly saves money, conserves water, and prevents potential water damage to your home. Most leaky faucet repairs are straightforward projects that average homeowners can complete successfully with the right tools and guidance.

Remember that each drop from a leaking faucet represents wasted water and increased utility costs. By taking action now, you’re making a smart investment in your home’s efficiency and your family’s budget.

If you’ve followed these steps and still have concerns about your faucet repair, or if you’d prefer professional assistance from the start, don’t hesitate to contact Weilhammer Plumbing Company for expert faucet repair service. Master plumber Mark W. can handle any leaky faucet challenge and ensure your plumbing system operates flawlessly for years to come.

Call Plumber Mark Now

Related Post: The Benefits of Installing a MOEN® Faucet in Your Kitchen

How to Extend the Life of Your Water Softener System 

A water softener is one of the most essential appliances for homeowners tackling hard water problems. By removing excess minerals like calcium and magnesium, it protects your plumbing, extends the life of your appliances, and ensures fresher-tasting water. But like any system, it requires regular care to function efficiently. Neglecting maintenance can lead to costly repairs, diminished performance, or even system failure.

Want to get the most out of your water softening system? Here’s a comprehensive guide to keeping your water softener in optimal condition for years to come. 

Call 317-784-1870 For Affordable Water Softening Service Near Indianapolis

Water Softener Care for Long-Lasting Performance

Keep Your Salt Tank Full 

One of the simplest yet most important maintenance tasks is regularly checking your salt tank. Salt is the lifeblood of a water softener, enabling it to remove hardness-causing minerals through the ion exchange process. Without enough salt, your system can’t regenerate properly, compromising its efficiency. 

How often should you check? Make it a habit to check your salt levels monthly and ensure the tank is at least half full. Remember to keep the salt dry and break up any clumps that form. 

Choose the Right Salt for Your System 

Not all salts are created equal. Different types of softener salts can significantly impact the efficiency and maintenance needs of your water softener. Here’s a breakdown of the most common options to help you decide which is best for your home: 

  • Solar Salt: Budget-friendly and effective for most systems. Great for softening but may need occasional cleaning due to impurities. 
  • Rock Salt: The most economical option, but often contains higher levels of insoluble impurities, leading to increased brine tank cleaning frequency. 
  • Evaporated Salt Pellets: The purest form of salt, minimizing residue buildup and reducing maintenance. 
  • Salt with Iron Remover: Ideal if you have iron-rich water, this type prevents rust buildup and extends the system’s life. 

Pro Tip: High-quality salts, such as evaporated pellets, reduce the risk of salt bridging and improve the overall performance of your water softening system. 

Clean Your Brine Tank Regularly 

Over time, impurities in salt or residual sludge can accumulate in the brine tank, causing clogs and reducing system efficiency. Cleaning the tank every 6–12 months can prevent these issues. 

Step-by-Step Brine Tank Cleaning Guide: 

  1. Turn off the water softener and disconnect it from its power source. 
  2. Remove excess water and salt from the tank. Use a scoop or small container to make the process easier. 
  3. Mix soapy water and scrub the inside of the tank with a brush. Rinse thoroughly with clean water. 
  4. Add fresh salt and refill the tank with water. 
  5. Power the system back on and allow it to regenerate. 

Routine cleaning not only keeps your tank in great condition but also ensures uninterrupted hard water removal. 

Explore Our Cost-Saving Water Softener Solutions!

Addressing Iron Build-Up 

If your water source contains high levels of iron, your water softening system may struggle to handle the buildup. When untreated, iron can clog the resin bed, reduce efficiency, and cause rust stains in your water supply. 

Quick solution?Use salts with iron-removing agents or apply iron removal treatments every 3–6 months to prevent blockages and protect your system. If stains persist or if you suspect extensive buildup, consider contacting a professional for water softener repair or a complete cleaning of the resin bed. 

Schedule Professional Inspections 

Some issues are best left to the experts. Annual, professional inspections are critical in identifying potential problems before they escalate. A qualified water softening technician can recalibrate your settings, test the system’s performance, and replace worn-out components. 

When to Call a Technician: 

  • Changes in water quality, such as increased hardness. 
  • Excessive salt consumption or salt bridging in the tank. 
  • The system fails to regenerate or makes unusual noises. 
  • Visible sediment or rust stains in your water. 

An annual check-up ensures your system operates efficiently and allows you to take advantage of any water softener warranties you might have. 

The Key to Hard Water Treatment Success 

Proper maintenance of your water softener isn’t just about avoiding costly repairs; it’s about enjoying the long-term benefits of a reliable, efficient system. 

Here are the main takeaways for extending the life of your water softener system:

  • Check your salt levels monthly and keep your tank at least half full. 
  • Choose the right salt for optimal performance; evaporated pellets are highly recommended. 
  • Clean your brine tank every 6–12 months to prevent buildup and clogs. 
  • Address iron buildup by using dedicated salt or applying iron removal treatments. 
  • Schedule annual professional inspections to catch issues early and protect your investment. 

By integrating these simple steps into your routine, you’ll ensure your system continues to provide clean, soft water while saving you time and money. 

FAQ’s About Water Softener Maintenance

How often should I add salt to my water softener? 

It depends on your household water usage, but typically you should check the salt levels once a month and refill the brine tank as needed. Ensure the salt level remains at least halfway full for optimal performance.

What type of salt is best for my water softener? 

Pellet or crystal salt is commonly recommended, though you should consult your water softener’s user manual. For areas with high iron content in water, consider using salt formulated for iron removal.

How can I tell if my water softener is working properly? 

Signs of a functioning water softener include no hard water stains, smoother skin after washing, and efficient soap lather. If you notice mineral buildup or hard water effects returning, it might be time for maintenance or repair.

Can I use my water softener during a power outage? 

Most water softeners require electricity to regenerate and function correctly. During an outage, the system won’t regenerate until power is restored, but you can still use water under normal conditions.

What should I do if my water softener starts making unusual noises? 

Unusual sounds could indicate issues such as a clogged valve, resin tank problems, or debris inside the system. Inspect your unit for visible issues and consider contacting a professional if the problem persists.

Conclusion

Maintaining your water softener doesn’t have to be a complicated process, and the benefits it brings to your home are well worth the effort. By staying proactive with regular checks, proper cleaning, and occasional professional servicing, you can extend the life of your system and avoid costly repairs down the line. Not only will your appliances run more efficiently, but you’ll also enjoy the lasting benefits of soft, clean water for your household.

Remember, a well-cared-for water softener is an investment in your home’s comfort and your family’s wellbeing. Stay diligent, and your system will reward you with years of reliable performance.

Are you noticing poor performance from your water softener or dealing with persistent hard water issues? Don’t wait for the problem to worsen. Contact to Weilhammer Plumbing Company today for expert water softener repair, maintenance, or installation services. Our specialists are here to ensure your system runs smoothly and efficiently.

Schedule a Free Inspection Now

Related Post: The Role of Salt Pellets in a Conventional Water Softener

Why Your Water Isn’t Staying Hot And How to Fix It

Nothing ruins a relaxing morning quite like stepping into a lukewarm shower when you’re expecting soothing hot water. Water heating problems are among the most common household frustrations, disrupting daily routines and leaving homeowners puzzled about what went wrong.

Understanding why your water heater isn’t performing as expected can save you time, money, and the inconvenience of unexpected cold showers. While some issues require professional intervention, many common hot water problems have straightforward solutions that homeowners can address with basic tools and safety precautions.

The good news is that most water heating issues stem from a handful of identifiable causes. By learning to recognize these problems and their symptoms, you can often restore your hot water supply quickly and prevent future disruptions.

Call 317-784-1870 For Affordable Hot Water Repair in Indianapolis

Common Causes Behind Your Hot Water Problem

Faulty Thermostat Settings

Your water heater’s thermostat acts as the control center for temperature regulation. When this component malfunctions or gets incorrectly adjusted, you’ll experience inconsistent water temperatures or no hot water at all. The thermostat might be set too low, damaged by power surges, or simply worn out from years of use.

Most residential water heaters perform optimally with thermostat settings between 120-140°F. Settings below this range result in lukewarm water, while excessively high temperatures create scalding risks and waste energy.

Sediment Buildup in Your Tank

Over time, minerals from your water supply settle at the bottom of your water heater tank, creating a thick layer of sediment. This accumulation acts as a barrier between the heating element and the water, significantly reducing heating efficiency. You might notice rumbling or popping sounds coming from your unit—these unusual noises are telltale signs of sediment interference.

Hard water accelerates this process, making regular water heater maintenance even more critical for homes with high mineral content in their water supply.

Inadequate Tank Size for Your Needs

A water heater that’s too small for your household’s demands will struggle to meet your hot water requirements. If your hot water supply runs out quickly during showers or when running multiple appliances, your tank capacity might be insufficient.

The average household needs approximately 10-15 gallons of hot water per person per day. A family of four typically requires a 40-50 gallon tank, though usage patterns and simultaneous demand affect these calculations.

Poor Insulation Causing Heat Loss

Water heaters lose heat through their tanks and connecting pipes, especially in unheated areas like basements or garages. Without proper insulation, your system works harder to maintain water temperature, leading to higher energy bills and reduced performance.

Older water heaters often lack adequate factory insulation, making aftermarket insulation blankets a worthwhile investment for improved efficiency.

Heating Element Failure

Electric water heaters rely on heating elements to warm the water, while gas units use burners. When these components fail, your water heater repair needs become more complex. Electric units typically have two elements—upper and lower—and the failure of either affects heating performance differently.

Gas water heaters may experience pilot light issues, burner problems, or gas supply interruptions that prevent proper heating.

Troubleshooting Steps You Can Take Yourself

Check and Adjust Your Thermostat

Safety first: Always turn off power to electric units or gas supply to gas units before beginning any inspection.

Locate your thermostat panel and check the temperature setting. If it’s set below 120°F, gradually increase it to an appropriate level. For electric units, you may have separate upper and lower thermostats that should be set to the same temperature.

Test the water temperature at a faucet after making adjustments, allowing time for the system to heat the water. Be cautious of scalding accidents—water above 140°F can cause burns within seconds.

Flush Your Tank to Remove Sediment

Annual tank flushing removes accumulated sediment and restores heating efficiency. Connect a garden hose to the drain valve at the bottom of your tank, ensuring the other end drains to an appropriate location.

Turn off the power or gas supply, then open the drain valve to release water and sediment. Allow several gallons to drain until the water runs clear. This process may take 30-60 minutes depending on sediment levels.

Safety note: The water will be extremely hot, so exercise caution during this procedure.

Improve Insulation Around Your Tank and Pipes

Installing an insulation blanket around your water heater tank reduces heat loss and improves efficiency. These blankets are available at most hardware stores and can reduce standby heat losses by 25-45%.

Don’t forget to insulate hot water pipes, especially those running through unheated spaces. Pipe insulation is inexpensive and easy to install, providing immediate benefits for water temperature retention.

Inspect Heating Elements and Components

While homeowners can visually inspect heating elements for obvious damage or corrosion, testing electrical components requires specialized equipment and expertise. Look for signs of rust, mineral buildup, or physical damage around heating elements.

Gas water heaters require inspection of the pilot light, burner, and venting system. If you notice soot, unusual flames, or gas odors, discontinue use immediately and contact a professional.

Schedule a Water Heater Inspection Today! 📅

When Professional Help Is Necessary

Complex Electrical or Gas Issues

Water heater systems involve potentially dangerous electrical connections and gas lines. Any work involving these components should be handled by licensed professionals like Weilhammer Plumbing Co. to ensure safety and code compliance.

Signs that require immediate professional attention include gas odors, electrical sparking, unusual sounds, or visible damage to electrical connections.

Persistent Problems After Basic Troubleshooting

If you’ve attempted basic troubleshooting without improvement, underlying issues may require professional diagnosis. Complex problems like internal tank damage, advanced electrical faults, or gas line issues need expert evaluation.

Professional plumbing technicians have specialized tools to test heating elements, diagnose thermostat problems, and identify issues that aren’t visible to homeowners.

Prevention Tips for Long-Term Performance

Schedule Regular Maintenance

Annual professional maintenance extends your water heater’s lifespan and prevents many common problems. During these visits, technicians can flush the tank, test components, inspect safety features, and identify potential issues before they cause complete system failure.

Consider Water Softening Solutions

Installing a water softener reduces mineral content in your water supply, significantly decreasing sediment accumulation in your tank. This investment pays dividends in reduced maintenance needs and improved efficiency.

Homes with hard water should prioritize water softening to protect not just their water heater, but all water-using appliances throughout the house.

Monitor Your System’s Performance

Regular inspection of the area around your water heater helps identify leaks, corrosion, or other issues early. Look for water stains, rust, or unusual sounds during operation.

For homeowners considering replacement, Rheem water heaters offer exceptional efficiency and reliability, backed by advanced technology that addresses many common water heating challenges.

Frequently Asked Questions (FAQ’s)

How often should I drain my water heater to prevent sediment buildup?

Most manufacturers recommend annual tank flushing, though homes with hard water may benefit from semi-annual maintenance.

What temperature should I set my water heater to for optimal efficiency and safety?

120°F provides adequate hot water for most households while minimizing scalding risk and energy waste.

What are the signs that my water heater needs replacement?

Age over 10-12 years, frequent repairs, rust-colored water, and inadequate hot water supply indicate replacement may be necessary.

How can I improve my current water heater’s energy efficiency?

Insulation blankets, pipe insulation, temperature adjustments, and regular maintenance significantly improve efficiency without replacement costs.

Conclusion

Water heating problems don’t have to disrupt your daily routine indefinitely. While basic troubleshooting can resolve many common issues, persistent problems require professional expertise to ensure safe, effective solutions.

Understanding your water heater’s operation helps you maintain optimal performance and recognize when professional intervention is necessary. Regular maintenance, proper settings, and attention to warning signs keep your system running efficiently for years.

Don’t let water heating issues compromise your comfort and safety. Contact Weilhammer Plumbing Company for expert repair services and professional guidance tailored to your specific water heating needs.

Request a Free Repair Estimate

Related Post: Water Heater Not Getting Hot? Your Personal Troubleshooting Guide

The Ultimate Guide to Maintaining Your Home’s Plumbing System

A well-maintained plumbing system is the backbone of a comfortable home, yet many homeowners don’t think about their pipes, drains, and fixtures until something goes wrong. By the time you notice a major plumbing problem, you could be facing expensive repairs and potential water damage that affects your entire property.

Proper plumbing maintenance isn’t just about fixing issues when they arise—it’s about preventing them from happening in the first place. Regular upkeep can extend the life of your plumbing system, reduce water waste, and save you thousands of dollars in emergency repairs. Whether you’re a seasoned DIY enthusiast or new to home maintenance, understanding the basics of plumbing care will help you protect one of your home’s most essential systems.

This comprehensive guide will walk you through the key aspects of home plumbing maintenance, from simple daily checks to seasonal preparations. You’ll learn when you can handle tasks yourself and when it’s time to call a professional plumbing company for assistance.

Call 317-784-1870 For Home Plumbing Maintenance in Indianapolis
Call 317-784-1870 For Home Plumbing Maintenance and Repair in Indianapolis

Residential Plumbing Maintenance 101

Regular Checks for Leaks and Drips

The foundation of effective plumbing maintenance lies in conducting regular inspections throughout your home. Small plumbing leaks might seem insignificant, but they can waste thousands of gallons of water annually and lead to costly damage if left unchecked.

Inspect Visible Pipes

Start your inspection routine by examining all visible pipes, particularly those under sinks, around your water heater, and in your basement or crawl space. Look for signs of moisture, discoloration, or mineral deposits that indicate ongoing leaks. Check the connections where pipes join together, as these areas are prone to developing leaks over time.

Address Dripping Faucets

A dripping faucet represents one of the most common plumbing problems homeowners face. A single leaky faucet can waste gallons of water over time, driving up your utility bills unnecessarily. In many cases, you can stop the leak by replacing a worn-out washer—a simple fix that requires shutting off the water supply, disassembling the faucet handle, and installing a new washer of the same size.

Check Toilets for Leaks

Don’t forget to inspect your toilet for leaks, which often go unnoticed. Add a few drops of food coloring to the toilet tank and wait 15 minutes. If color appears in the bowl without flushing, you have a leak that needs attention. These toilet leaks typically result from a warped flapper or faulty chain mechanism.

How to Unclog Drains Safely

Drain clogs are inevitable in any home, but how you address them makes all the difference for your plumbing system’s longevity. Many homeowners reach for chemical drain cleaners, but these harsh products can corrode pipes and create more problems than they solve. 

Use a Plunger Correctly 

The most effective first step for a clogged drain involves using a plunger correctly. For sink drains, ensure you have a good seal around the drain opening and use firm, consistent plunging motions. The suction and pressure created by proper plunging can dislodge most minor blockages without damaging your pipes. 

Try the Baking Soda and Vinegar Method 

For a natural and effective drain cleaning solution, try the baking soda and vinegar method. Pour one cup of baking soda down the drain, followed by one cup of white vinegar. Cover the drain with a plug or cloth for 15 minutes, then flush with hot water. This combination creates a fizzing action that can break down organic matter and clear minor blockages. 

Use a Drain Snake for Deeper Clogs 

When plunging doesn’t work, a drain snake becomes your next tool of choice. Feed the snake into the drain while turning the handle clockwise, allowing it to grab onto hair, soap buildup, and other debris. This method reaches clogs deeper in the drain pipes that plunging cannot address.

Winterizing Your Plumbing to Prevent Freezing

Protecting your plumbing system from freezing temperatures is crucial for preventing burst pipes and costly water damage. Frozen pipes can expand and crack, leading to flooding when temperatures rise and the ice melts. 

Insulate Exposed Pipes 

Begin your winterization process by insulating exposed pipes with foam sleeves, particularly those in unheated areas like basements, crawl spaces, and garages. These inexpensive foam insulators slip over pipes easily and provide essential protection against freezing temperatures. 

Focus on Outdoor Faucets and Hoses 

Pay special attention to outdoor faucets and hose connections. Disconnect and drain all garden hoses, then shut off the water supply to exterior faucets from inside your home. Open the outdoor faucets to drain any remaining water, as even small amounts can freeze and cause damage. 

Allow Warm Air to Circulate 

Keep cabinet doors open under sinks during extremely cold weather to allow warm air to circulate around the pipes. 

Maintain Safe Temperatures When Away 

If you’re leaving town during winter months, maintain your home’s temperature at least 55 degrees Fahrenheit and ask someone to check on your property regularly.

Contact Us for Expert Plumbing Repair Services 🪠✨

Maintaining Your Water Heater

Your water heater works hard to provide hot water for showers, dishes, and laundry, but it requires regular maintenance to operate efficiently and safely. Sediment buildup is one of the most common issues that affects water heater performance and lifespan.

Flush Your Water Heater Tank Annually 

Flushing your water heater tank annually removes sediment buildup that accumulates at the bottom of the tank. Turn off the power supply and water inlet valve, then connect a garden hose to the drain valve at the tank’s bottom. Open the valve and drain several gallons of water until it runs clear. This simple maintenance task improves efficiency and extends your water heater’s life.

Check the Temperature and Pressure Relief Valve 

Check the temperature and pressure relief valve by lifting the lever slightly to ensure water flows out and stops when you release it. This safety valve prevents dangerous pressure buildup, so replace it immediately if it doesn’t function properly.

Inspect the Anode Rod Regularly 

Inspect the anode rod every few years, as this component protects your tank from corrosion. If the rod is heavily corroded or less than half an inch thick, replacement is necessary. This maintenance step can add years to your water heater’s lifespan.

When to Call a Professional Plumber

While many plumbing maintenance tasks are suitable for DIY homeowners, certain situations require professional expertise. Recognizing when to call a master plumber service can prevent minor issues from becoming major disasters. 

Seeing Some Common Signs

Contact a professional plumbing company immediately if you experience multiple drain clogs throughout your home, as this often indicates a main sewer line problem. Similarly, sudden drops in water pressure, discolored water, or sewage odors require professional diagnosis and plumbing repair. 

Sump Pump Repair and Replacement

Sump pump repair should always be handled by professionals, as these systems protect your home from flooding during heavy rains. Regular testing involves pouring water into the pit to ensure the pump activates, but repairs and installations require specialized knowledge. 

Major Plumbing Installations and Local Regulations 

Major installations, such as new fixtures, pipe replacements, or water heater installations, typically require permits and must comply with local plumbing codes. Homeowners in Indianapolis should check with the City’s Department of Water Management for current regulations regarding backflow prevention, water conservation, and waste disposal requirements.

Essential Tools Every Homeowner Should Have

Having the right tools makes basic plumbing maintenance much easier and more effective. A quality plunger remains essential for clearing clogged drains and should be part of every homeowner’s toolkit. Choose a cup plunger for sinks and a flange plunger for toilets.

An adjustable wrench proves useful for tightening or loosening nuts and bolts throughout your plumbing system. Pair this with tongue-and-groove pliers for gripping and turning various plumbing components.

A basin wrench, designed specifically for reaching nuts in tight spaces under sinks, saves time and frustration during faucet repairs.

Plumber’s tape (also called Teflon tape) helps seal pipe threads to prevent leaks when installing or repairing threaded connections.

A drain snake allows you to tackle stubborn clogs that resist plunging, making it a valuable addition to your plumbing toolkit.

Common Mistakes That Cost Homeowners Money

Over-Tightening Fittings 

Understanding common plumbing maintenance mistakes helps you avoid costly errors that can damage your system. Over-tightening fittings ranks among the most frequent mistakes, as excessive force can damage threads and actually cause leaks rather than prevent them.

Using Chemical Drain Cleaners 

Using chemical drain cleaners excessively corrodes pipes over time, particularly older metal pipes. These harsh chemicals can also damage rubber seals and gaskets throughout your plumbing system. Stick to mechanical methods and natural cleaning solutions for safer drain maintenance.

Ignoring Minor Leaks 

Many homeowners ignore minor leaks, thinking they’ll address them later. However, even small leaks can escalate into major water damage, mold growth, and structural problems. Address leaks promptly to prevent expensive consequences.

Improper Disposal of Grease and Debris 

Improper disposal of grease, food scraps, and other debris down drains creates blockages and can damage your entire plumbing system. Dispose of grease in the trash after it cools and solidifies, and use drain screens to catch food particles.

Key Takeaways

Maintaining your home’s plumbing system requires consistent attention and the right approach to both prevention and repairs. Regular inspections, proper winterization, and using appropriate tools and techniques will keep your plumbing running smoothly for years to come.

Remember that while many maintenance tasks are within reach of dedicated DIY homeowners, professional expertise becomes essential for complex repairs, installations, and emergency situations. Don’t hesitate to invest in professional plumbing services when the situation warrants it—the cost of proper repairs is always less than the expense of water damage and emergency fixes.

Start implementing these maintenance practices today, and your plumbing system will reward you with reliable performance and fewer unexpected problems.

For expert assistance with any plumbing challenges beyond your comfort level, Weilhammer Plumbing Company for professional plumbing services that keep your home’s water systems functioning perfectly. State-licensed master plumber Mark serves both residential and commercial clients.

Request a Free Estimate Now

Related Post: 7 Essential Tips for Maintaining Residential Plumbing

5 Warning Signs Your Water Softener Needs Immediate Repair

Your water softener works quietly behind the scenes, transforming harsh mineral-laden water into the soft, gentle water your home deserves. When this essential system starts failing, the effects ripple through your daily routine—from frustrating scale buildup on fixtures to the disappointment of dingy laundry that never seems truly clean.

Understanding the warning signs of water softener problems can save you from costly appliance damage, sky-high energy bills, and the daily inconvenience of living with hard water. More importantly, catching these issues early often means the difference between a simple repair and a complete water softener replacement.

Let’s explore the five most common indicators that your water softening system needs professional attention, so you can restore your home’s water quality before minor issues become major headaches.

Call 317-784-1870 For Indianapolis Water Softener Repair

Signs That Suggest You Need to Repair Your Water Softener

Sign 1: Hard Water Symptoms Make an Unwelcome Return

The most obvious sign your water softener needs repair is the gradual return of hard water symptoms throughout your home. These telltale signs often appear slowly, making them easy to dismiss until they become undeniable.

Scale Buildup on Fixtures and Appliances

White, chalky deposits around faucets, shower heads, and inside appliances indicate your water softener isn’t removing minerals effectively. This scale buildup doesn’t just look unsightly—it restricts water flow and forces appliances to work harder, increasing energy costs and shortening their lifespan.

Soap Scum and Cleaning Difficulties

Hard water prevents soap from lathering properly, leaving behind a sticky film on dishes, shower doors, and bathtubs. You might notice glasses coming out of the dishwasher with spots, or shower surfaces that seem impossible to keep clean no matter how much scrubbing you do.

Dry Skin and Hair Issues

Hard water strips natural oils from your skin and hair, leaving you feeling dry and itchy after showering. Your hair may appear dull, feel rough to the touch, or become difficult to manage. These symptoms often worsen over time as mineral deposits accumulate.

Laundry Problems

Clothes washed in hard water often look dingy, feel stiff, or fade prematurely. The minerals interfere with detergent effectiveness, trapping soap residue in fabric fibers. White clothes may appear gray, and colors lose their vibrancy faster than expected.

Sign 2: Unusual Noises During Operation

A properly functioning water softener operates relatively quietly, with only subtle sounds during its regeneration cycle. When you start hearing unusual noises, it’s often your system’s way of calling for help.

Grinding Sounds

Grinding noises typically indicate mechanical issues within the control valve or motor assembly. These sounds suggest that internal components are wearing against each other, potentially due to mineral buildup or component failure. Ignoring grinding sounds can lead to complete system breakdown.

Gurgling or Bubbling

Gurgling sounds during regeneration may point to air trapped in the system or blockages in the drain line. While sometimes normal, persistent gurgling often indicates plumbing issues that require professional attention.

Banging or Knocking

Loud banging sounds, especially during the regeneration cycle, could signal problems with water pressure, loose pipes, or malfunctioning valves. These noises not only indicate potential water softener problems but may also stress your home’s plumbing system.

Request a Free Estimate for Water Softener Repair 🆓

Sign 3: Salty Taste in Your Drinking Water

Your water should never taste salty. When it does, it’s a clear indication that something has gone wrong with your water softening system’s regeneration process.

A salty taste typically means salt water from the brine tank is entering your home’s water supply instead of being properly flushed during regeneration. This can happen due to:

  • Damaged seals in the control valve
  • Incorrect timer settings
  • Clogged injector or drain systems
  • Stuck bypass valve

Even after running taps for several minutes, a persistent salty taste indicates a serious malfunction requiring immediate professional repair. Not only is salty water unpleasant to drink, but it can also be harmful to individuals on sodium-restricted diets.

Sign 4: Excessive Salt Consumption

A properly calibrated water softener uses salt efficiently, regenerating only when necessary. When your system starts consuming salt at an alarming rate, several issues could be at play.

Salt Bridge Formation

Salt bridges occur when humidity causes salt to form a hard crust over the water in your brine tank. This prevents proper brine solution formation, forcing your system to regenerate more frequently while failing to actually soften the water effectively.

Mushy Salt at Tank Bottom

When salt dissolves and recrystallizes at the bottom of your brine tank, it creates a thick, mushy layer that interferes with proper brine production. This salt mush prevents the system from creating the concentrated salt solution necessary for effective ion exchange.

Frequent Regeneration Cycles

If your water softener regenerates more often than programmed or runs continuous regeneration cycles, internal components may be malfunctioning. This wastes tremendous amounts of salt and water while failing to provide adequate water softening.

Monitor your salt usage patterns. A sudden increase in consumption often indicates your system needs professional evaluation and repair.

Sign 5: Visible Damage or Leaking

Physical damage to your water softener system requires immediate attention to prevent water damage to your home and ensure continued water quality.

Tank Cracks or Damage

Cracks in the resin tank or brine tank compromise system integrity and can lead to significant water damage. Even small cracks tend to worsen over time, especially under the constant pressure of your water system.

Water Leaks

Any water pooling around your water softener indicates a leak that needs immediate repair. Leaks can occur at:

  • Pipe connections
  • Control valve assembly
  • Tank fittings
  • O-rings and seals

Corroded Fittings and Connections

Corrosion around fittings, valves, or connection points weakens these components and often leads to leaks or complete failure. Corroded water softener parts should be replaced promptly to maintain system reliability.

Control Panel Malfunctions

Digital displays that show error codes, fail to respond to programming, or display incorrect information indicate electrical or mechanical problems within the control system. These issues often affect the entire regeneration process.

View Our Affordable Water Softening Solutions 👀

Frequently Asked Questions About Water Softener Repairs

How often should a water softener be serviced?

Most water softeners benefit from annual professional maintenance, though systems handling very hard water or high usage may need service twice yearly. Regular maintenance helps prevent major repairs and extends system life.

What are the most common water softener issues?

The most frequent problems include salt bridge formation, resin bed fouling, control valve malfunctions, and clogged injectors or drain lines. Many of these issues stem from improper maintenance or poor water quality conditions.

Is it more cost-effective to repair or replace a water softener?

This depends on your system’s age, repair costs, and efficiency. Generally, systems under 10 years old with repair costs under 50% of replacement cost are worth fixing. Older systems or those requiring expensive water softener parts may be better candidates for replacement.

Can I repair a water softener myself?

While homeowners can handle basic maintenance like adding salt or cleaning brine tanks, most repairs require specialized knowledge and tools. Attempting complex repairs without proper expertise can void warranties and create safety hazards.

How do I know what size water softener I need?

New water softener sizing depends on your household size, daily water usage, and water hardness levels. A professional can calculate your specific needs based on these factors and recommend appropriate capacity.

What are the signs of a malfunctioning water softener?

Key indicators include returning hard water symptoms, unusual operating noises, salty water taste, excessive salt usage, and visible damage or leaks. Any significant change in system performance warrants professional evaluation.

Your Next Steps

Recognizing these warning signs early can save you significant money, frustration, and inconvenience. Water softener problems rarely resolve themselves and typically worsen over time, leading to more extensive damage to both your system and your home’s plumbing and appliances.

Professional water softener repair not only addresses immediate issues but also helps identify potential problems before they cause system failure. Regular maintenance and prompt attention to warning signs ensure your investment in quality water continues protecting your home and family.

If you’ve noticed any of these warning signs in your Indianapolis metropolitan area home, don’t wait for complete system failure. Contact Weilhammer Plumbing Company today for a free quote on water softener repair or replacement. Ask us about our below-market priced Clack Water Softeners!

Request a Free Quote Now

Related Post: Water Softener Leaks: Prevention, Identification, and Repair

Why Your Hot Water Heater Won’t Drain

Is your water heater refusing to drain, leaving you in a puddle of frustration? Draining your water heater is crucial for maintaining its efficiency and lifespan, preventing sediment buildup, and ensuring consistent hot water supply. However, several common issues can hinder this process, leading to potential headaches for homeowners.

In this comprehensive guide, we’ll explore the common culprits behind a water heater that won’t drain, provide step-by-step troubleshooting tips, and offer insights into when it’s time to call in the professionals. Whether you’re a seasoned DIY enthusiast or a first-time homeowner, understanding these issues will empower you to tackle water heater problems head-on and ensure your system runs smoothly for years to come. Let’s dive in!

Call 317-784-1870 For Hot Water Heater Repair Service in Indianapolis

Common Causes of Water Heater Drainage Problems

When your water heater won’t drain properly, several factors could be at play. Understanding these common culprits will help you diagnose the issue more effectively and determine the appropriate solution.

Sediment Buildup

One of the most frequent causes of water heater draining problems is sediment buildup at the bottom of the tank. Over time, minerals from hard water, sand, and other debris settle at the bottom of your water heater, creating a thick layer that can clog the drain valve. This sediment acts like a plug, preventing water from flowing out during the draining process.

Signs of sediment buildup include reduced hot water capacity, unusual noises during operation, and water that takes longer to heat. If you live in an area with hard water, sediment buildup can occur more rapidly, making regular water heater maintenance even more critical.

Faulty Drain Valve

The drain valve is a small but crucial component located at the bottom of your water heater tank. When this valve becomes damaged, corroded, or simply worn out, it can prevent proper drainage. A faulty drain valve might not open completely, leak when closed, or become stuck in one position.

Common signs of a faulty drain valve include water pooling around the base of your water heater, inconsistent drainage flow, or complete inability to drain water from the tank. Fortunately, checking and replacing a drain valve is often a straightforward water heater repair that many homeowners can handle.

Airlock Issues

An airlock occurs when air becomes trapped in the water lines, preventing proper water flow. This can happen during the draining process, especially if the water heater hasn’t been drained in a long time. The trapped air creates pressure that blocks water from flowing out through the drain valve.

Airlocks are particularly common when homeowners attempt water heater flushing without following proper procedures. Understanding how to release these airlocks is essential for successful water heater draining.

Closed or Blocked Water Supply

Sometimes, the issue isn’t with the drain valve itself but with the water supply to the tank. If the cold water inlet valve is closed or blocked, it can create a vacuum effect that prevents water from draining properly. This is because air needs to enter the tank to replace the water being drained.

Corroded Internal Components

Older water heaters may develop corrosion in internal components, including the dip tube or tank walls. This corrosion can create debris that blocks the drain valve or interferes with proper water flow. If your water heater is approaching the end of its lifespan, corrosion-related drainage problems may indicate the need for replacement.

Schedule a Free Water Heater Inspection

When to Call a Professional Water Heater Plumber

While many water heater maintenance tasks can be handled by homeowners, certain situations require professional expertise. Knowing when to seek help can prevent damage to your system and ensure your safety.

Safety Concerns

If you’re uncomfortable working with plumbing or electrical components, don’t hesitate to call a professional. Water heaters involve both water and energy systems that can be dangerous if handled improperly. Additionally, if you notice signs of gas leaks, electrical issues, or significant corrosion, professional intervention is necessary.

Persistent Problems

When troubleshooting steps don’t resolve the drainage issue, it’s time to consult an expert. Persistent problems may indicate underlying issues that require specialized knowledge and tools to address effectively.

Age and Condition Factors

If you’re unsure about the age or condition of your water heater, a professional assessment can help determine whether repair or replacement is the most cost-effective option. Most water heaters last 8-12 years, and older units may experience multiple issues that make replacement more economical than continued repairs.

Complex Repairs

Some water heater repair tasks require specialized tools, permits, or expertise that go beyond typical homeowner capabilities. Professional plumbers have the training and equipment necessary to handle complex repairs safely and effectively.

Prevention Tips for Water Heater Maintenance

Preventing drainage problems is far more cost-effective than dealing with water heater repair issues after they occur. Regular maintenance can extend your water heater’s lifespan and ensure consistent performance.

Establish a Regular Maintenance Schedule

Follow this recommended maintenance schedule to keep your water heater in optimal condition:

  • Flush your water heater every 6-12 months to remove sediment buildup
  • Inspect the drain valve annually for leaks and proper function
  • Check the anode rod every 2-3 years and replace if corroded
  • Test the temperature and pressure relief valve annually
  • Schedule professional inspections every 2-3 years

Monitor Water Quality

If you have hard water, consider installing a water softener to reduce mineral deposits in your water heater. This can significantly reduce sediment buildup and extend your unit’s lifespan. Keep records of your water quality and any changes that might affect your water heater’s performance.

Insulate for Efficiency

Consider insulating your water heater and surrounding pipes to improve energy efficiency and reduce heat loss. This not only saves money on utility bills but also reduces the stress on your system, potentially extending its lifespan.

Regular Visual Inspections

Periodically check the area around your water heater for signs of leaks, moisture, or corrosion. Early detection of problems can prevent minor issues from becoming major water heater problems requiring extensive repair or replacement.

Keep Detailed Records

Maintain a record of all maintenance activities, including dates, observations, and any repairs made. This information is valuable for warranty claims and helps professional technicians diagnose issues more effectively.

In Summary

Regular water heater maintenance isn’t just about preventing no hot water situations—it’s about protecting your investment and ensuring reliable performance for years to come. By understanding common drainage issues and implementing preventive measures, you can avoid costly repairs and extend your water heater’s lifespan.

When drainage problems persist despite your best efforts, don’t view professional help as a last resort—consider it an investment in your home’s comfort and your family’s safety. A well-maintained water heater ensures consistent hot water supply while operating efficiently and safely.

If you’re in the Indianapolis area and need expert assistance, Weilhammer Plumbing Company is here to help. Our team of licensed and experienced plumbers can handle any water heater issue, big or small. Don’t let a faulty water heater disrupt your daily routine – take action to protect it today.

Contact Us Now for a Free Quote

Related Post: Water Heater Not Getting Hot? Your Personal Troubleshooting Guide

10 Common Plumbing Issues and How to Fix Them

Plumbing problems can disrupt your routine and drain your wallet if not addressed quickly. With some basic knowledge and tools, you can often tackle these issues yourself and save time and money. This guide will walk you through ten common plumbing issues, their causes, and how to fix them. Plus, we’ll cover when it’s time to call a plumbing repair company in Indianapolis for professional help.

Call 317-784-1870 To Get in Touch With Our Plumbing Repair Company in Indianapolis

Top 10 Plumbing Problems and What To Do About Them

Issue 1: Dripping Faucets

Why it Happens 

  • Dripping faucets are typically caused by a worn-out washer or O-ring, which can no longer form a tight seal.

DIY Fix 

  • Turn off the water supply to the faucet. 
  • Use a screwdriver and wrench to disassemble the faucet.
  • Replace the rubber washer or O-ring.
  • Reassemble the faucet and turn the water supply back on.

Estimated Cost 

  • Parts: $5-$10 
  • Professional Service (if needed): $75-$200 

Issue 2: Running Toilets

Why it Happens 

  • A running toilet often results from a faulty flapper that doesn’t seal properly, or an issue with the chain or float.

DIY Fix 

  • Remove the tank lid and inspect the flapper. 
  • Replace a worn or damaged flapper, or adjust the chain if it’s too long or tangled. 
  • Check the float to ensure it’s not stuck and adjust the water level if necessary.

Estimated Cost 

  • Parts: $10-$20 
  • Service: $100-$250 

Issue 3: Clogged Drains

Why it Happens 

  • Hair, grease, and debris can build up over time, causing blockages in your sink, shower, or tub.

DIY Fix 

  • Use a plunger to loosen the clog. 
  • Pour a mixture of baking soda and vinegar down the drain, followed by hot water. 
  • For stubborn clogs, use a drain snake (auger) to break up the blockage.

Estimated Cost 

  • Parts (drain snake): $15-$30 
  • Service (if persistent): $80-$200 

Safety Tip 

  • Avoid chemical drain cleaners as they can damage pipes over time.

Contact Our Indianapolis Plumbers Today

Issue 4: Low Water Pressure

Why it Happens 

  • Mineral buildup in faucets or showerheads can reduce water flow. Low pressure can also be a sign of a bigger issue, such as a leak or problems with the water supply.

DIY Fix 

  • Remove faucet aerators or showerheads and soak them in vinegar to dissolve mineral deposits. 
  • Check for leaks in pipes. 
  • Use a water pressure gauge to measure pressure levels. If below 40 PSI, contact a plumbing repair company.

Estimated Cost 

  • Parts (water pressure gauge): $20-$40 
  • Service (if pressure regulator replacement is required): $150-$400 

Issue 5: Leaky Pipes

Why it Happens 

  • Leaks can result from worn-out seals, damaged joints, or corrosion in older pipes.

DIY Fix 

  • Turn off the water supply to the pipe. 
  • Use Teflon tape to seal small leaks temporarily. 
  • Apply epoxy putty or a pipe repair clamp for a more lasting fix. 

Estimated Cost 

  • Parts (Teflon tape, repair clamp): $10-$20 
  • Service (complex repairs): $150-$500+ 

When to Call a Pro 

  • If the leak is extensive or involves a hard-to-access location, schedule an inspection with a master plumber.

Issue 6: Water Heater Problems

Why it Happens 

  • Issues like no hot water, strange noises, or leaks are often caused by sediment buildup, a faulty thermostat, or a failing thermocouple.

DIY Fix 

  • Flush the tank to remove sediment. 
  • Inspect and replace the thermostat or thermocouple if necessary. 
  • Use a multimeter to test electrical connections.

Estimated Cost 

  • Parts (thermocouple): $20-$40 
  • Service (repairs or replacement): $200-$800+ 

Issue 7: Garbage Disposal Issues

Why it Happens 

  • Clogs or jams happen when improper items (like bones or grease) are put into the disposal.

DIY Fix 

  • Turn off the disposal and unplug it. 
  • Use tongs or pliers to remove any visible blockages. 
  • Reset the disposal with the included Allen wrench.

Estimated Cost 

  • Parts (reset tool often included): Free 
  • Service (repairs or replacement): $100-$300 

Issue 8: Frozen Pipes

Why it Happens 

  • When water inside pipes freezes, it can expand and cause the pipe to burst.

DIY Fix 

  • Turn off the main water supply. 
  • Use a hair dryer or heat lamp to thaw the pipe. Start near the faucet and work your way back. 
  • Open the faucet to relieve pressure as the ice melts.

Estimated Cost 

  • Parts (heat tape): $20-$50 
  • Service (for burst pipes): $100-$400+ 

Issue 9: Sewer Line Backup

Why it Happens 

  • Tree roots, grease buildup, or sagging sewer lines can cause backups, leading to unpleasant odors and slow drains.

Solution 

Estimated Cost 

  • Professional Service: $200-$1,000+ 

Top Signs of Sewer Line Problems

Issue 10: Septic Tank Problems

Why it Happens 

  • A full or improperly maintained septic tank can lead to slow drains, backups, or bad odors.

Solution 

  • Contact a professional septic plumbing service for inspection, pumping, or repairs.

Estimated Cost 

  • Professional Service (pumping): $200-$500 

Plumbing Repair FAQ

Q: Can I fix a leaking faucet myself? 

Yes, you can fix a leaking faucet yourself by replacing worn out washers or seals. However, if the problem persists, it’s best to call a professional plumber.

Q: How do I know when my water heater needs to be replaced? 

If your water heater is more than 10 years old and regularly requires repairs, it may be time for a replacement. Other signs include rust-colored water and strange noises coming from the tank.

Q: Why does my toilet keep running?

This could be due to a faulty flapper valve or fill valve. You can try adjusting or replacing these parts yourself, but if the issue continues, it’s best to call a plumber. They can diagnose the problem and make any necessary repairs.

Q: How can I prevent clogged drains?

One way to prevent clogs is to avoid flushing anything other than waste and toilet paper down the toilet. In the bathroom, use drain covers to catch hair and debris before it goes down the shower or sink drain. Regularly pouring hot water and vinegar down your drains can also help keep them clear. If you do experience a clog, avoid using chemical drain cleaners as they can cause damage to your pipes. Instead, try using a plunger or plumbing snake.

Q: What should I do if my garbage disposal is not working?

If your garbage disposal is not working, first make sure that it is plugged in and turned on. If it still doesn’t work, try pressing the reset button located under the unit or manually turning the blades with an Allen wrench to dislodge any obstructions. Avoid putting large or hard items down the disposal, and always run cold water while using it to help flush debris down the drain.

Q: What should I do if my toilet keeps running?

A running toilet can waste a significant amount of water and increase your utility bills. One common cause of a running toilet is a faulty flapper valve, which can be easily replaced. You can also check for a faulty flush valve or fill valve, and replace these components as needed.

If you are unsure how to identify or fix the issue, it is best to consult a professional plumber for assistance. Remember to always turn off the water supply to your toilet before attempting any repairs. Regular maintenance can also help prevent future running toilet issues. Check the condition of all toilet components periodically and replace them if necessary.

Q: What should I do if my showerhead is clogged?

If your showerhead isn’t producing a strong and steady stream of water, it may be clogged with mineral deposits or debris. To clean it, mix equal parts white vinegar and water in a plastic bag and place it over the showerhead, securing it with a rubber band. Let it soak for at least an hour before removing the bag and using a toothbrush to gently scrub away any remaining buildup. Alternatively, you can also unscrew the showerhead and soak it in the vinegar solution overnight before rinsing it off and reattaching it.

RECAP

Plumbing problems aren’t just inconvenient; they can lead to costly repairs if ignored. Regular maintenance and inspections are key to keeping your home’s plumbing system in top shape. 

However, some problems require more than a DIY fix. If you’re dealing with persistent issues or want to ensure your plumbing complies with Indianapolis plumbing codes, it’s time to call in the experts. 

Schedule a plumbing inspection with Weilhammer Plumbing Company in Indianapolis today and keep your home running smoothly.

Book a Plumbing Inspection Now

Related Post: Do I Need My Plumbing Inspected?

Is Your Water Softener Broken?

A water softener is one of the most invaluable appliances in many Indianapolis homes. It ensures that your water is free from hard minerals like calcium and magnesium, preventing scale buildup in your plumbing, protecting your appliances, and making your water feel softer on your skin. However, like any appliance, water softeners can run into problems that hinder their efficiency. This post will help you assess whether your water softener is broken, guide you through troubleshooting steps, and recommend when it’s time to call in the professionals.

Call 317-784-1870 For Affordable Water Softener Repair in Indianapolis

Common Signs of Water Softener Problems

How do you know if your water softener isn’t working properly? Keep an eye out for these common signs indicating that your system may need repair:

Hard Water Symptoms 

Are you noticing soap scum on your dishes or fixtures? Is your soap not lathering as well as usual? These are telltale signs that hard minerals might still be in your water due to a malfunctioning water softener.

Unusual Noises 

A water softener running smoothly operates quietly in the background. If you hear grinding, clicking, or other strange noises during its cycle, it’s a sign that internal components might be broken or worn out. 

Leakage 

Water pooling near your unit or visible drips from the tank or plumbing connections could indicate a serious leak. This should be addressed immediately to avoid further damage.

Changes in Water Taste or Smell 

If your water suddenly tastes metallic or smells unpleasant, your water softener might not be effectively filtering out impurities.

Constant Cycling or No Regeneration at All 

If your system seems to keep regenerating excessively or not at all, this could be due to issues with its motor, timer, or control valve.

DIY Checks and Troubleshooting 

Before calling a professional, it’s worth performing some basic checks to rule out minor issues. Here are a few steps you can take:

1. Check the Salt Levels 

Ensure the brine tank has adequate salt and that it hasn’t formed a salt bridge (a crusty layer that prevents salt from dissolving). Break up the salt bridge gently if needed. 

2. Inspect the Settings 

Double-check the system settings and timers. A power outage could have reset your system, and misaligned settings might be causing the problems.

3. Clean the Tank 

Sediment buildup in the brine tank or resin tank can impact performance. Flush the tank and clean it thoroughly, following the manufacturer’s guidelines.

4. Look for Blockages 

Inspect hoses and connectors for blockages or kinks that could interfere with water flow.

5. Test Water Hardness 

Use a local water test kit or contact Indianapolis water testing services to check hardness levels. If the hardness exceeds expected levels, your softener isn’t doing its job correctly.

While these steps can help mitigate minor problems, some issues require deeper expertise.

Contact Us for Water Softener Repair

When to Call a Professional

If your DIY troubleshooting doesn’t resolve the issue, or if your system has more complex problems, such as motor malfunction or resin bead damage, it’s time to seek professional water softener repair services. Here’s when professional help is essential:

Motor or Timer Issues – The motor and control valve are crucial to a water softener’s regeneration cycle. Repairs or replacements in this area require specialized knowledge to restore functionality.

Resin Bead Replacement – If resin beads are damaged, they won’t remove minerals effectively, and a professional can safely replace or replenish them.

Persistent Leakage – Whether it’s a crack in the tank or leaking from plumbing connections, professional technicians can diagnose and fix the issue quickly.

System Replacement – If your water softener is over 10 years old and repairs are becoming frequent, it may be more cost-effective to replace the unit. An expert can help you choose and install the right system for your needs.

At our Indianapolis-based plumbing repair service, we provide fast response times, skilled technicians familiar with local water conditions, and transparent pricing to ensure you get the help you need without added stress.

Pro Tips for Maintaining Your Water Softening System 

Regular maintenance can prolong the life of your water softener and improve its efficiency. Here are some tips to keep your system running smoothly:

  • Refill Salt Regularly – Check your brine tank monthly and refill it with high-quality salt to ensure continuous operation.
  • Flush the System Periodically – Flush out any excess sediment or scale buildup to maintain optimal performance.
  • Inspect for Wear and Tear – Look for signs of wear on pipes, connectors, and tank interiors during your routine checks.
  • Schedule Yearly Professional Servicing – Annual servicing can diagnose potential problems early, extend the life of your water softener, and keep it running at peak efficiency.
  • Monitor Your Water Quality – Regularly test your water hardness to ensure your water softener is meeting expectations.

By taking these proactive steps, you can minimize disruptions and enjoy consistently soft water in your home.

Why Regular Maintenance Matters

A well-maintained water softener doesn’t just enhance water quality; it also protects your appliances, reduces energy costs, and prevents plumbing repairs caused by scaling. Regularly servicing your water softener is an investment that pays off in smoother operations and greater peace of mind.

Concluding Thoughts

Indy homeowners know that hard water is an unavoidable reality in this region—but living with the effects of hard water doesn’t have to be. By keeping an eye out for common signs of wear, handling simple fixes yourself, and knowing when to call a professional, you can keep your water softener running like new.

If you’re dealing with a broken water softener or suspect your system isn’t working as it should, don’t wait! Our expert technicians at Weilhammer Plumbing Company are here to help with fast, reliable, and affordable service tailored specifically to Indianapolis homes. Schedule your water softener repair or maintenance appointment today for softer water tomorrow.

Schedule Service Now

Related Post: How to Choose a Water Softening Unit for Your Home or Business